My Journey to Mastering the Perfect Beef Tenderloin
Let me tell you about the first time I attempted to cook beef tenderloin for my husband’s 40th birthday. Picture this: me, standing in my kitchen at 5 PM, holding this beautiful (and expensive!) piece of meat, completely terrified I was about to ruin our special dinner. I had watched cooking shows, read countless recipes, but nothing prepared me for the anxiety of cooking such a premium cut. That night ended with us ordering pizza because I was too scared to even start!
But here’s the thing – beef tenderloin doesn’t have to be intimidating. After years of trial and error (and yes, a few overcooked disasters), I’ve cracked the code to cooking beef tenderloin like a pro chef right in your own kitchen. Trust me, once you master this technique, you’ll wonder why you ever hesitated. This cut of meat has become my go-to for every special occasion, from Christmas dinner to anniversary celebrations.
Have you ever wondered why restaurant beef tenderloin tastes so incredibly different from what most of us make at home? The secret isn’t just in the quality of the meat – it’s in the technique, and I’m about to share every single trick I’ve learned along the way.
Table of Contents
Ingredients List
Here’s what you’ll need to create restaurant-quality beef tenderloin at home. I’ve included my personal notes about each ingredient because, honestly, the details matter so much with this dish:
For the Beef:
- 3-4 lb whole beef tenderloin, trimmed (I always ask my butcher at Miller’s Market to trim it for me – they do a much better job than I ever could!)
- 2 tablespoons kosher salt (I swear by Diamond Crystal – it has the perfect texture)
- 1 tablespoon freshly cracked black pepper
- 2 tablespoons olive oil (the good stuff – I use the bottle I brought back from my trip to California last year)
For the Herb Crust:
- 3 cloves garlic, minced (the smell when you crush fresh garlic is absolutely divine)
- 2 tablespoons fresh rosemary, chopped fine (if you can only find dried, use 1 tablespoon)
- 2 tablespoons fresh thyme leaves (I grow this in my little herb garden by the kitchen window)
- 1 tablespoon Dijon mustard (adds a subtle tang that makes all the difference)
Substitution Notes: If you can’t find fresh herbs, dried will work – just use half the amount. For the Dijon, you can substitute with whole grain mustard or even skip it entirely if you’re not a mustard fan (though I highly recommend giving it a try).
Timing
This is where so many home cooks get tripped up, so let me break down the timing like I wish someone had done for me years ago:
Prep Time: 15 minutes (including bringing the meat to room temperature) Cook Time: 25-35 minutes (depending on your desired doneness) Rest Time: 10 minutes (this is crucial – don’t skip it!) Total Time: 50-60 minutes
Here’s my personal timing tip: I always start this process about an hour and a half before I want to serve dinner. This gives me buffer time because, let’s be honest, cooking always takes longer than we think it will! I usually prep my side dishes first – roasted vegetables or garlic mashed potatoes – so they can be warming in the oven while the beef rests.
Step-by-Step Instructions
Step 1: Preparing Your Beef Tenderloin
Remove your beef tenderloin from the refrigerator 30-45 minutes before cooking. This is non-negotiable! Cold meat in a hot oven cooks unevenly, and I learned this the hard way during my second attempt at this recipe. Pat the meat completely dry with paper towels – I mean really dry. Any moisture will prevent that beautiful crust from forming.
Season generously with kosher salt and black pepper on all sides. Don’t be shy here – this is a thick piece of meat that can handle bold seasoning. I like to press the seasoning into the meat gently with my hands.
Step 2: Creating the Herb Paste
In a small bowl, mix together the minced garlic, rosemary, thyme, Dijon mustard, and olive oil. This creates a paste that will become the most aromatic, flavorful crust you’ve ever tasted. The first time I made this, my neighbor knocked on the door asking what smelled so incredible!
Rub this herb mixture all over the seasoned tenderloin. Trust me, get your hands dirty here – it’s the best way to ensure even coverage.
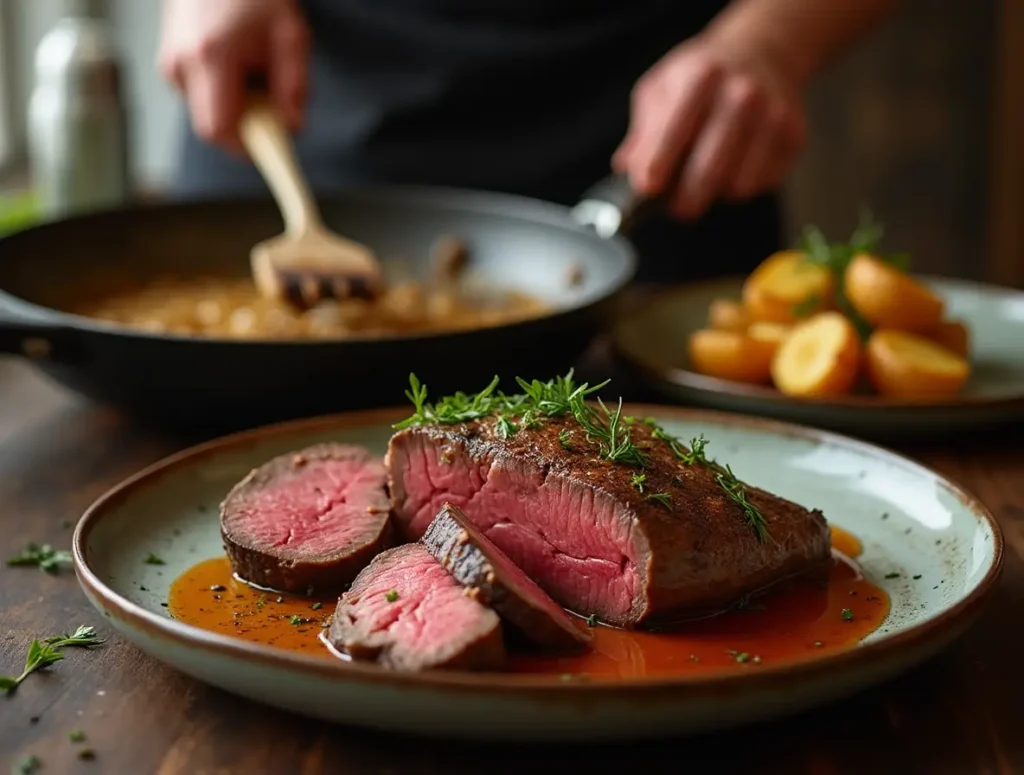
Step 3: Searing for the Perfect Crust
Preheat your oven to 425°F. Heat a large oven-safe skillet (I use my trusty cast iron pan that belonged to my grandmother) over medium-high heat. Add a little oil to the pan – just enough to coat the bottom.
Sear the tenderloin on all sides until golden brown, about 2-3 minutes per side. This is where the magic happens – you’ll hear that beautiful sizzling sound, and the aroma will fill your entire kitchen. Don’t move the meat too quickly; let each side develop a proper crust.
Step 4: Roasting to Perfection
Transfer your skillet directly to the preheated oven. For medium-rare (which I highly recommend), cook for 20-25 minutes, or until the internal temperature reaches 125°F. I invested in a good meat thermometer after too many guessing games, and it was one of the best kitchen purchases I ever made.
Here’s my temperature guide:
- Rare: 120°F
- Medium-rare: 125°F
- Medium: 135°F
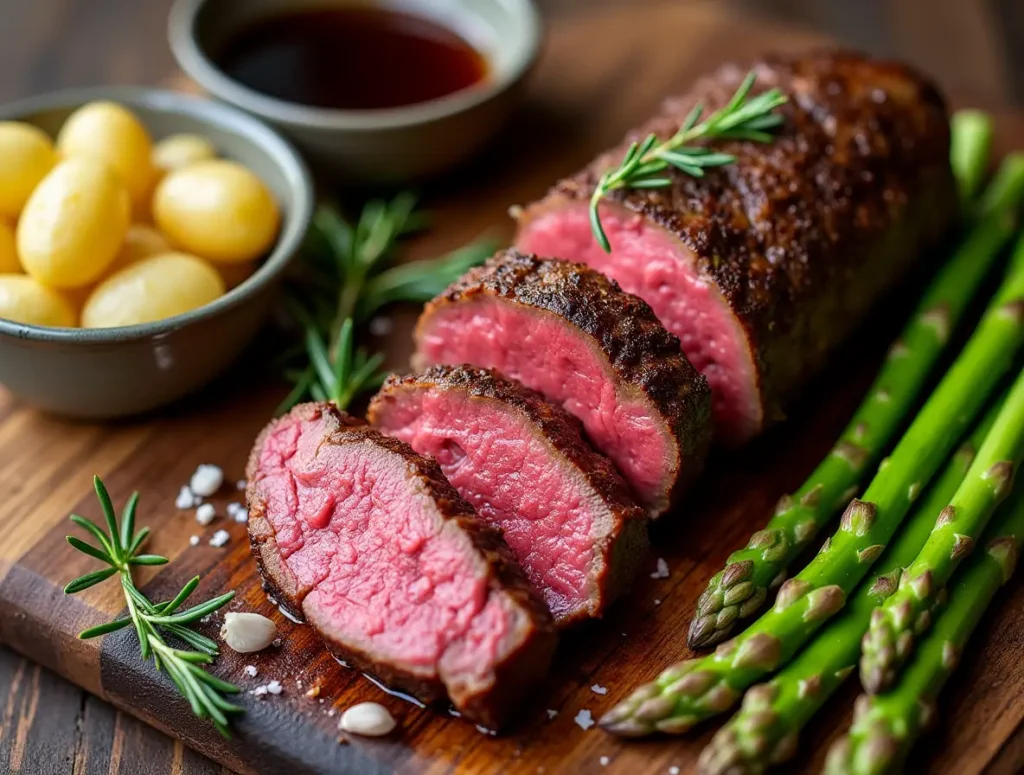
Step 5: The Critical Rest Period
Remove the tenderloin from the oven and tent it loosely with foil. Let it rest for 10 minutes. I cannot stress this enough – don’t skip this step! The first time I made this recipe successfully, I was so excited that I sliced into it immediately, and all those beautiful juices ran out onto the cutting board instead of staying in the meat.
Nutritional Information
As someone who tries to balance indulgence with nutrition (especially after my doctor’s last check-up!), I always like to know what I’m serving my family:
Per 6-ounce serving:
- Calories: 280
- Protein: 42g
- Fat: 12g
- Carbohydrates: 1g
- Iron: 15% daily value
- Zinc: 35% daily value
Beef tenderloin is incredibly rich in high-quality protein and essential minerals. While it’s definitely a splurge meal, it’s also packed with nutrients that our bodies need. I always pair it with plenty of vegetables to create a well-rounded meal that doesn’t leave me feeling guilty about the indulgence.
Healthier Alternatives for the Recipe
When my sister was following a stricter diet last year, I adapted this recipe to be a bit lighter without sacrificing flavor:
Lower Sodium Version: Use herb salt or make your own seasoning blend with dried herbs, garlic powder, and just a pinch of regular salt.
Lighter Herb Crust: Replace half the olive oil in the herb paste with low-sodium beef broth or even water. It still creates a beautiful crust but cuts some of the added fats.
Portion Control: Instead of serving large steaks, I sometimes slice the tenderloin thin and serve it over a big salad with roasted vegetables. Everyone gets to enjoy the flavor without the huge portion size.
Add More Vegetables: I’ve started stuffing the tenderloin with sautéed spinach and mushrooms. It adds nutrients and fiber while making the meat go further for larger families.
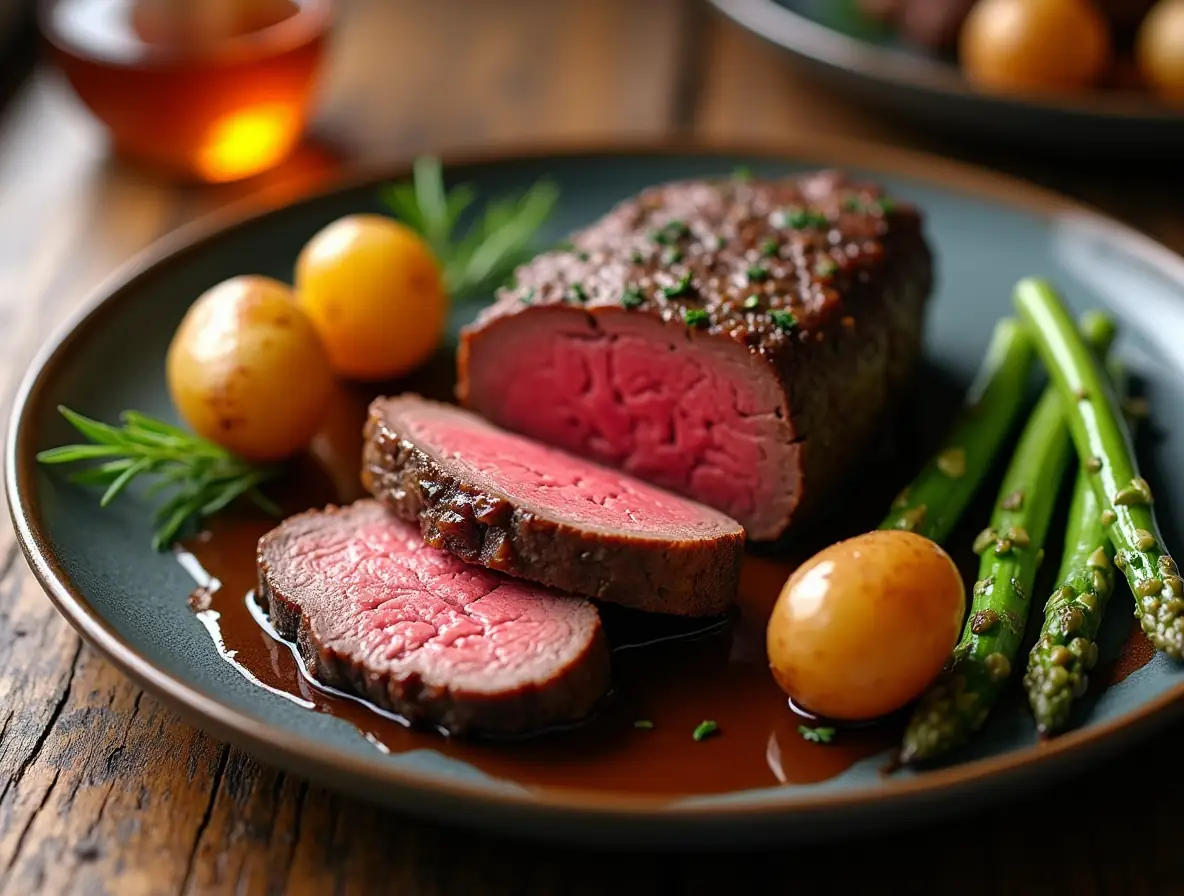
Serving Suggestions
This beef tenderloin has been the star of so many memorable meals in our house! Here are my favorite ways to serve it:
For Sunday Family Dinners: I serve it with roasted root vegetables (carrots, parsnips, and potatoes) and a simple green salad. The earthiness of the vegetables complements the rich meat perfectly.
Holiday Entertaining: Pair it with garlic mashed potatoes, roasted Brussels sprouts with bacon, and dinner rolls. This combination was such a hit at our last Christmas dinner that my mother-in-law asked for the recipes!
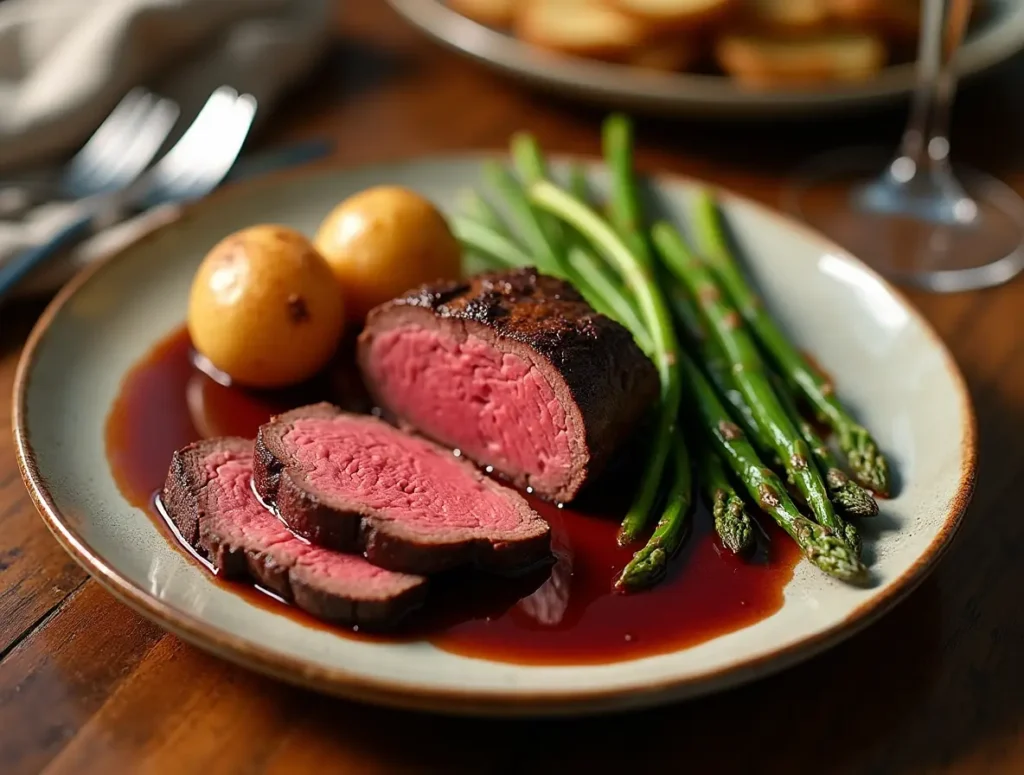
Date Night at Home: Slice it thin and serve over arugula with roasted cherry tomatoes and a balsamic glaze. Add some crusty bread, and you’ve got a restaurant-quality meal right in your dining room.
Make-Ahead Tip: The herb-crusted tenderloin actually tastes incredible cold the next day, sliced thin for sandwiches. I use it on sourdough with horseradish sauce and fresh greens – it’s become my husband’s favorite lunch!
Common Mistakes to Avoid
Let me save you from the mistakes I made during my learning process:
Overcooking: This is the big one! Beef tenderloin goes from perfect to overcooked very quickly. Invest in a good meat thermometer – I can’t say this enough. My first successful tenderloin happened only after I stopped trying to guess doneness by touch.
Not Letting It Rest: I mentioned this earlier, but it’s worth repeating. That 10-minute rest period isn’t optional. I once served a tenderloin immediately after cooking because my guests were getting hungry, and I watched all those delicious juices flow out onto the plates instead of staying in the meat.
Using a Cold Pan: Always preheat your skillet before adding the meat. I learned this lesson when my tenderloin stuck to the pan and tore when I tried to flip it. The searing step is crucial for flavor and presentation.
Skipping the Room Temperature Step: Cold meat from the fridge will cook unevenly. I set a timer now to remind myself to take the meat out early enough.
Over-seasoning the Herb Paste: Less is more with the Dijon mustard. The first time I made the herb crust, I used too much mustard and it overpowered the meat’s natural flavor.
Storing Tips for the Recipe
Leftover beef tenderloin (if you’re lucky enough to have any!) stores beautifully:
Refrigerator Storage: Wrap tightly in plastic wrap or store in an airtight container for up to 3 days. I often cook an extra-large tenderloin on Sunday specifically so we can enjoy leftovers throughout the week.
Reheating: The key to reheating without overcooking is low and slow. I slice it first, then warm it gently in a low oven (275°F) for just a few minutes. You can also enjoy it cold – it’s delicious in salads or sandwiches.
Meal Prep: I sometimes slice the cooked, cooled tenderloin and portion it into containers with roasted vegetables for quick, elegant lunches during busy weeks.
Freezing: While you can freeze cooked beef tenderloin for up to 3 months, I honestly think the texture suffers a bit. If you do freeze it, thaw slowly in the refrigerator and use it sliced thin in sandwiches rather than as a main course.
FAQs
Q: My neighbor Susan asked me – can I cook beef tenderloin on a regular baking sheet instead of a skillet?
A: You can, but you’ll miss out on that incredible seared crust! If you don’t have an oven-safe skillet, sear the meat in a regular pan first, then transfer it to a baking sheet for the oven portion.
Q: Jenny from my book club wants to know – how do I know if my tenderloin is trimmed properly?
A: A properly trimmed tenderloin should have most of the silver skin removed and be relatively uniform in thickness. Don’t worry if it’s not perfect – even my butcher leaves some silver skin sometimes. You can trim it yourself with a sharp knife if needed.
Q: Can I make this recipe for a larger crowd? A: Absolutely! I’ve made this for up to 12 people using two tenderloins. Just make sure your oven can accommodate your pan size, and you might need to adjust cooking time slightly for thicker pieces.
Q: What if I don’t have fresh herbs?
A: Dried herbs work too! Use about half the amount called for in the recipe. The flavor won’t be quite as bright, but it’ll still be delicious.
Q: My husband asked – is there a way to tell doneness without a thermometer?
A: While I always recommend using a thermometer, experienced cooks can use the finger test – the meat should feel like the flesh between your thumb and forefinger when you make an “OK” sign for medium-rare. But honestly, get the thermometer – it takes all the guesswork out!
Conclusion
Mastering beef tenderloin really comes down to understanding timing, temperature, and patience. The key points are: bring it to room temperature first, create a flavorful herb crust, sear for color and flavor, roast at the right temperature, and always let it rest before slicing. With these techniques, you’ll create restaurant-quality results every single time.
If this recipe inspired you to try more special occasion cooking, make sure to subscribe to my blog for weekly updates. Next week, I’m sharing my foolproof method for the perfect side dish to accompany this tenderloin – roasted garlic mashed potatoes that will make your guests think you went to culinary school!
Happy cooking, friends, and remember – you’ve got this!