
Introduction: Taking Meatloaf Beyond the Oven
You know those recipes that instantly transport you back to childhood? For me, meatloaf is definitely one of them. My mom’s classic oven-baked version was a Thursday night staple in our home, but trust me when I say that grilled meatloaf takes this comfort food classic to an entirely new dimension. The smoky flavors, that perfect char on the exterior, and the juicy interior – it’s a game-changer that my family now requests weekly.
Have you ever wondered why some grilled meatloaf falls apart while others maintain that perfect slice-able texture? After seven (yes, seven!) failed attempts that left me with crumbly meat scattered across my grill grates, I finally cracked the code to the perfect grilled meatloaf. It’s been my most-requested recipe at neighborhood cookouts ever since.
The first time I tried grilling meatloaf was for my husband’s birthday cookout three summers ago. I wanted something beyond the usual burgers and hot dogs, something that would make everyone say “wow.” Let me tell you, watching everyone’s expressions as I brought out that beautifully caramelized grilled meatloaf was worth every minute of experimentation!
Table of Contents
Ingredients

For the perfect grilled meatloaf (serves 6-8):
- 2 pounds ground beef (I use 80/20 for the right fat content)
- 1 pound ground pork
- 2 large eggs, lightly beaten
- 1 medium yellow onion, finely diced (about 1 cup)
- 3 cloves garlic, minced
- 1 cup bread crumbs (I make my own from day-old sourdough my local bakery sells)
- 1/2 cup whole milk
- 1/4 cup ketchup (plus extra for topping)
- 2 tablespoons Worcestershire sauce
- 1 tablespoon Dijon mustard
- 1 tablespoon fresh thyme leaves (the ones from my garden have so much more flavor than store-bought)
- 1 tablespoon fresh parsley, finely chopped
- 1 teaspoon smoked paprika (I discovered this Spanish variety at a spice shop in Chicago that adds the perfect hint of smokiness)
- 1 1/2 teaspoons sea salt
- 1/2 teaspoon freshly ground black pepper
For the glaze:
- 1/2 cup ketchup
- 2 tablespoons brown sugar
- 1 tablespoon apple cider vinegar
- 1 teaspoon garlic powder
- 1/2 teaspoon onion powder
- 1/4 teaspoon cayenne pepper (adjust to your heat preference – my kids prefer less!)
Timing
- Preparation time: 20 minutes
- Grill preheating: 15 minutes
- Cooking time: 60-75 minutes
- Total time: 1 hour 35 minutes – 1 hour 50 minutes
I typically prep my meatloaf mixture the night before – it not only saves time but actually improves the flavor as the spices have more time to meld together. This is my go-to Saturday afternoon cookout recipe when we have friends over, as I can prepare everything in advance and actually enjoy time with our guests instead of being stuck in the kitchen.
Step-by-Step Instructions
Step 1: Prepare Your Grill
Set up your grill for indirect heat cooking. For a gas grill, turn on burners on one side and leave the other side off. For a charcoal grill, pile your coals on one side, leaving the other side empty. You’re aiming for a temperature of around 350°F. If you’re using a smoker, set it to 350°F with your choice of wood chips (I love hickory or apple wood for meatloaf).
The first time I tried grilling meatloaf, I put it directly over the flames and ended up with a charred exterior and raw center – learn from my mistake and use indirect heat!
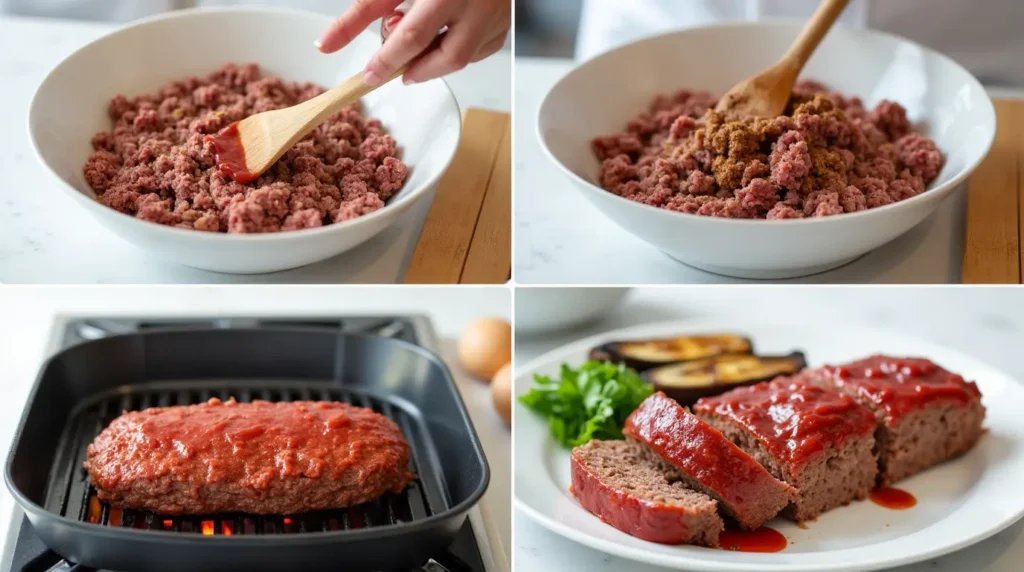
Step 2: Prepare Your Meatloaf Mixture
In a small bowl, combine bread crumbs and milk. Let this mixture sit for about 5 minutes until the bread crumbs absorb the milk. This panade is my secret weapon for keeping the meatloaf moist – I learned this trick from my grandmother who made the most tender meatballs you’ve ever tasted.
In a large mixing bowl, combine ground beef, ground pork, soaked bread crumbs, eggs, onion, garlic, ketchup, Worcestershire sauce, Dijon mustard, thyme, parsley, smoked paprika, salt, and pepper.
Trust me on this – mix with your hands just until combined. Overmixing will lead to a dense, tough meatloaf. I know it’s messy, but your hands are truly the best tools for this job!
Step 3: Form Your Meatloaf
Line a baking sheet with parchment paper. Turn the meat mixture onto the parchment and shape it into a uniform loaf, about 9″ x 5″. Having a consistent shape helps ensure even cooking throughout.
I actually use a loaf pan as a mold sometimes, pressing the mixture in firmly and then turning it out onto the parchment paper – a little trick I discovered after making a misshapen loaf that cooked unevenly.
Step 4: Prepare for Grilling
Here’s a crucial step that took me several attempts to figure out: create a “pan” from heavy-duty aluminum foil with the sides folded up about 1 inch tall. This will catch the drippings and prevent flare-ups. Place your shaped meatloaf on this foil pan.
For extra smoky flavor, I sometimes add wood chips to my charcoal, or use a smoker box on my gas grill. Applewood is my family’s favorite for the subtle sweet smokiness it adds.
Step 5: Make the Glaze
In a small bowl, whisk together all glaze ingredients until smooth. Set aside. I usually make a little extra because my family loves to use it as a dipping sauce after the meatloaf is cooked!
Step 6: Start Grilling
Transfer your meatloaf on its foil pan to the indirect heat side of your grill. Close the lid and let it cook for 30 minutes.
The biggest mistake I made early on was constantly opening the grill to check on it. Remember – if you’re lookin’, you ain’t cookin’! Keep that lid closed to maintain a consistent temperature.
Step 7: Apply the Glaze
After 30 minutes, carefully brush the top and sides of your meatloaf with the glaze. Close the lid and continue cooking.
Step 8: Check for Doneness
After about 60 minutes total cooking time, check the internal temperature with a meat thermometer. You’re looking for 160°F for ground beef. If it’s not quite there, continue cooking, checking every 5-10 minutes.
The first time I served undercooked meatloaf at a family gathering, my perfectionist cooking aunt gave me that look – you know the one! Now I never serve meatloaf without confirming it’s reached the proper temperature.
Step 9: Rest Before Serving
This is absolutely critical – let your masterpiece rest for at least 10-15 minutes before slicing. I know it’s hard to wait when everyone’s hovering around the kitchen sniffing the amazing aromas, but this resting time allows the juices to redistribute throughout the meat instead of running out when you cut into it.
Nutritional Information
- Calories: Approximately 320 per serving (based on 8 servings)
- Protein: 28g
- Carbohydrates: 12g
- Fat: 18g
- Fiber: 1g
- Sodium: 680mg
As someone who balances indulgence with nutrition in my family’s meals, I appreciate that this grilled meatloaf delivers protein and satisfaction while still fitting into a balanced diet. The portion size is filling without being excessive, and I typically serve it with plenty of vegetables to round out the meal.
Healthier Alternatives for the Recipe
If you’re watching your red meat intake like my husband has been since his last check-up, you can easily adapt this recipe:
- Substitute ground turkey or chicken for some or all of the beef and pork. Just add 2 tablespoons of olive oil to the mixture to maintain moisture.
- Use rolled oats instead of breadcrumbs for added fiber (my kids can’t even tell the difference!).
- For a gluten-free version, use gluten-free breadcrumbs or crushed rice crackers – this modification was a lifesaver when my niece who has celiac disease came to visit last summer.
- Reduce sodium by using low-sodium ketchup and Worcestershire sauce, or make your own tomato sauce with fresh herbs.
- Boost the vegetable content by adding finely grated zucchini or carrots – a sneaky way I get extra nutrients into my veggie-resistant teenagers!
Serving Suggestions
A perfect grilled meatloaf deserves perfect sides! Here are my family’s favorites:
- Classic mashed potatoes – the creamy texture pairs beautifully with the hearty meatloaf. My garlic and chive version has become a required pairing in our house.
- Grilled vegetables – since you’ve already got the grill going, throw on some asparagus, bell peppers, or zucchini during the last 10 minutes of cooking.
- Fresh garden salad with a tangy vinaigrette – the acidity cuts through the richness of the meatloaf.
- Macaroni and cheese – my kids’ absolute favorite pairing, especially my version with three cheeses and a crispy breadcrumb topping.
- Sweet potato fries – I toss them with olive oil, salt, and a touch of cinnamon before baking.
I served this grilled meatloaf at our Memorial Day cookout last year with a colorful array of sides, and my neighbor actually took a photo before eating because it looked “too good to eat!” (She promptly devoured it afterward, though!)
Common Mistakes to Avoid
Over my years of perfecting grilled meatloaf, I’ve made every mistake in the book. Let me save you the trouble:
- Using meat that’s too lean – without sufficient fat content, your meatloaf will be dry. My first attempt used 93% lean beef, and it had the texture of cardboard!
- Overmixing the ingredients – this compacts the meat and results in a dense, tough loaf. Mix just until combined, no more.
- Skipping the foil pan – I learned this lesson the hard way when half my meatloaf fell through the grill grates. That was a sad dinner night in the Harper household!
- Not allowing adequate preheating time – a properly preheated grill ensures even cooking from start to finish.
- Adding raw onions without sautéing them first – they’ll remain crunchy in the final product. I discovered this when my son picked out every piece of onion from his slice, creating what looked like an archaeological dig on his plate.
- Slicing the meatloaf immediately after cooking – patience is key! Let it rest to retain those flavorful juices.
Storing Tips for the Recipe
Grilled meatloaf might be even better the next day (if there are any leftovers!). Here’s how I handle storage:
- Cool the meatloaf completely before refrigerating.
- Store sliced or whole in an airtight container for up to 4 days in the refrigerator.
- For freezing, wrap individual slices in plastic wrap, then aluminum foil, and freeze for up to 3 months. This way, you can thaw just what you need for quick lunches.
- My favorite leftover hack: cold meatloaf sandwiches! Slice the meatloaf thin, add mayonnaise, lettuce, and tomato on sourdough bread for a lunch that makes my coworkers jealous.
I usually double this recipe intentionally to have leftovers. On busy weeknights when we’re shuttling between my daughter’s soccer practice and my son’s piano lessons, having pre-made meatloaf slices that just need reheating is a dinnertime lifesaver!
FAQs
Can I make this meatloaf without a grill?
Sarah from Denver asked me this same question last winter! Yes, you absolutely can bake it in the oven at 350°F for about the same amount of time (60-75 minutes). You’ll miss some of that smoky flavor, but it will still be delicious. Consider adding 1/2 teaspoon of liquid smoke to the mixture for a hint of that grilled taste.
Why does my meatloaf fall apart on the grill?
This is probably the most common question I get on my Instagram! Make sure you’re using the foil pan method I described, and don’t skip the binder ingredients (eggs and soaked breadcrumbs). Also, be sure your meatloaf is thoroughly chilled before grilling – I sometimes pop mine in the freezer for 15 minutes just before grilling.
Can I make this recipe ahead of time?
Absolutely! I often prepare the meatloaf mixture the day before and keep it covered in the refrigerator. This not only saves time but also allows the flavors to develop even more. Just bring it to room temperature for about 30 minutes before grilling.
What wood chips work best for smoking meatloaf?
After experimenting with different varieties, my family’s favorites are applewood for a sweeter, milder flavor, or hickory for a more robust smokiness. Cherry wood is also lovely if you want a slightly fruity note.
How do I know when my meatloaf is done without a thermometer?
While I strongly recommend using a meat thermometer for food safety, in a pinch you can make a small cut in the center – the meat should be firm and no longer pink, and the juices should run clear. However, investing in a good digital thermometer was one of the best kitchen decisions I ever made!
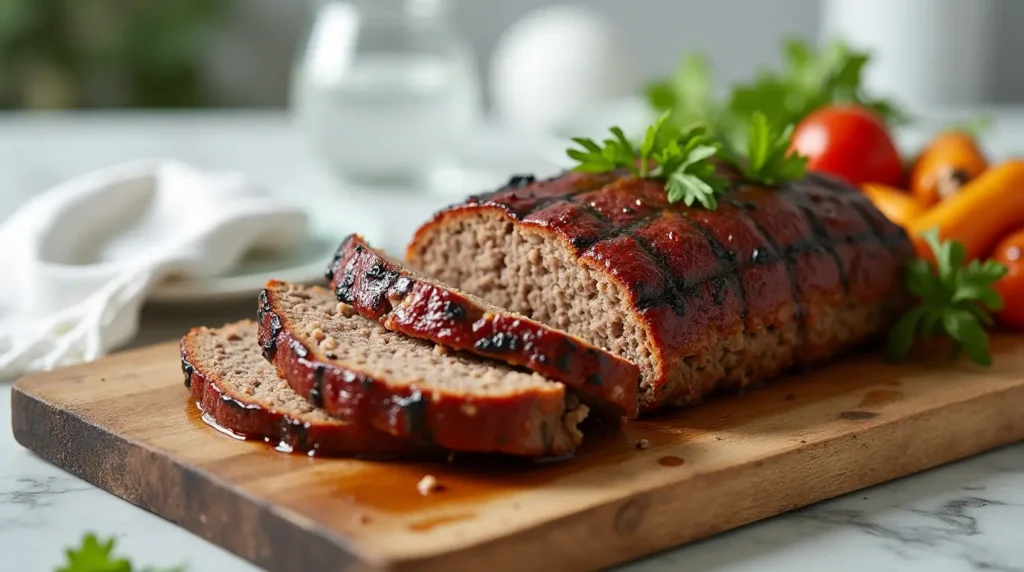
Conclusion
Grilled meatloaf transforms a beloved classic into something truly extraordinary. The combination of smoky exterior, juicy interior, and caramelized glaze creates a comfort food experience that’s familiar yet elevated. By following these steps – from choosing the right meat blend to allowing proper rest time – you’ll create a meatloaf that stands apart from any you’ve had before.
Don’t forget to subscribe for more recipes that bring family and friends together around the table. After all, that’s what cooking is really all about!