
My Love Affair with Southern Comfort Food
You know that feeling when you bite into something that instantly transports you back to childhood? That’s exactly what happens every time I make these fried chicken liver recipes. My husband used to wrinkle his nose at the mention of organ meat, but now he’s the first one standing by the stove asking, “Are they ready yet?” Trust me, once you master this technique, you’ll understand why Southern cooks have guarded these recipes like family heirlooms.
Have you ever wondered why some people are absolutely devoted to fried chicken livers while others won’t even try them? I think it all comes down to preparation – and honey, I’m about to share everything I’ve learned from years of perfecting these recipes in my own kitchen.
Table of Contents
Ingredients List
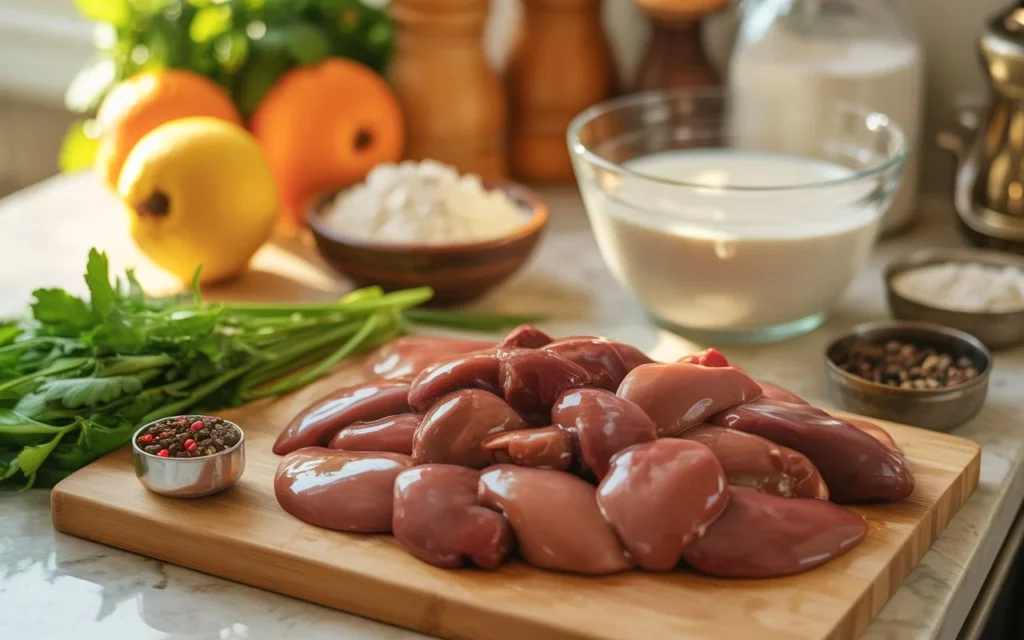
Here’s what you’ll need for my go-to fried chicken liver recipe. I’ve tried countless variations over the years, but this combination never fails to deliver that perfect balance of crispy exterior and tender, flavorful interior:
For the Chicken Livers:
- 1 pound fresh chicken livers (I always buy mine from the local butcher on Main Street – they’re so much fresher than the grocery store variety)
- 2 cups whole buttermilk (the tang is absolutely essential – don’t even think about substituting regular milk!)
- 1 large egg, beaten
- 2 teaspoons kosher salt
- 1 teaspoon freshly cracked black pepper
- 1/2 teaspoon cayenne pepper (adjust to your heat preference – I learned the hard way that my mother-in-law can’t handle spice!)
For the Coating:
- 2 cups all-purpose flour (I swear by King Arthur flour – it creates the most beautiful golden crust)
- 1/2 cup fine cornmeal (this is my secret ingredient that adds that perfect crunch)
- 2 teaspoons garlic powder
- 1 teaspoon onion powder
- 1 teaspoon paprika (I use the smoky Hungarian variety I discovered at a farmers market in Tennessee)
- 1/2 teaspoon dried thyme
- 1/2 teaspoon sage (reminds me of Thanksgiving at my childhood home)
- Salt and pepper to taste
For Frying:
- Vegetable oil or peanut oil for deep frying (about 4-6 cups, depending on your pot size)
Substitution Notes: If you can’t find buttermilk, you can make your own by adding 2 tablespoons of white vinegar or lemon juice to regular milk and letting it sit for 10 minutes. For a gluten-free version, I’ve successfully used a blend of rice flour and cornstarch, though the texture is slightly different.
Timing
This is one of those recipes where patience truly pays off, but the active cooking time is surprisingly manageable:
Prep Time: 25 minutes (plus 2-4 hours for marinating) Cook Time: 15 minutes Total Time: About 3 hours (mostly hands-off marinating time)
Here’s my typical timeline: I usually start the marinating process right after lunch on weekends, which gives me plenty of time to prep other sides for dinner. The actual frying happens quickly once you get started – we’re talking about 3-4 minutes per batch. This timing works perfectly for those Sunday family dinners when everyone’s gathered around the kitchen, sharing stories while I cook.
One thing I learned from my early disasters (and trust me, there were several!) is that rushing the marinating process results in tough, less flavorful livers. Now I always plan ahead, and the results speak for themselves.
Step-by-Step Instructions
Step 1: Preparing the Chicken Livers
Start by examining your chicken livers carefully. Remove any visible fat, connective tissue, or green spots (those are from the gallbladder and will make everything bitter – learned that lesson the hard way during my first attempt!). Cut larger livers in half so all pieces are roughly the same size. This ensures even cooking, which is crucial for that perfect texture we’re after.
Rinse the livers gently under cold water and pat them completely dry with paper towels. I can’t stress this enough – moisture is the enemy of crispy coating!
Step 2: The Buttermilk Bath
In a large bowl, whisk together the buttermilk, beaten egg, salt, pepper, and cayenne. Add the cleaned livers and make sure every piece is completely submerged. Cover the bowl with plastic wrap and refrigerate for at least 2 hours, but preferably 4.
This marinating step is where the magic happens – the acid in the buttermilk tenderizes the meat while the seasonings penetrate deep into each piece. My grandmother used to say, “Good things come to those who wait,” and she was absolutely right about this recipe.
Step 3: Setting Up Your Coating Station
About 30 minutes before you’re ready to fry, set up your breading station. In a large shallow dish (I use a 9×13 baking dish), whisk together the flour, cornmeal, garlic powder, onion powder, paprika, thyme, sage, salt, and pepper.
The cornmeal addition was something I discovered by accident when I ran out of flour halfway through coating one batch. The texture was so superior that I never went back to the all-flour method!
Step 4: Heating the Oil
Fill a heavy-bottomed pot or deep fryer with oil to a depth of about 3 inches. Heat to 350°F (175°C). I use a candy thermometer clipped to the side of the pot – temperature control is absolutely critical here. Too hot, and the outside burns before the inside cooks; too cool, and you’ll end up with greasy, soggy coating.
While the oil heats, line a large plate or baking sheet with paper towels and set up a wire rack nearby for draining.
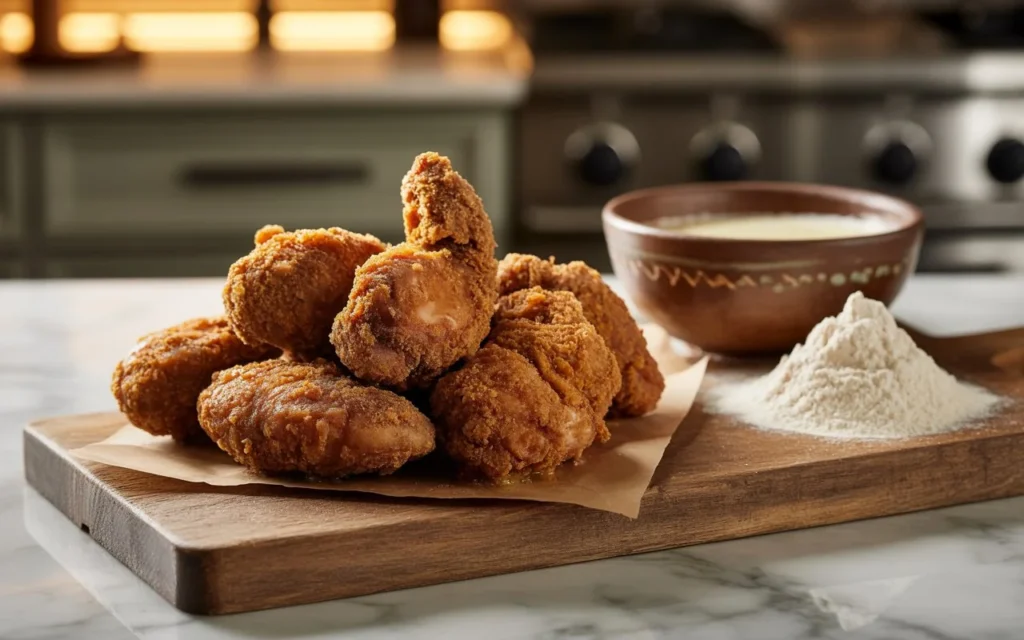
Step 5: The Coating Process
Remove the livers from the buttermilk marinade, letting excess drip off but don’t shake them completely dry – you want some of that buttermilk clinging to help the flour mixture stick. Working with one piece at a time, dredge each liver in the seasoned flour mixture, pressing gently to ensure the coating adheres well.
Here’s a tip I learned from watching my grandmother: use one hand for wet ingredients and one hand for dry. This prevents your fingers from getting completely coated in the process – trust me, it makes everything so much easier!
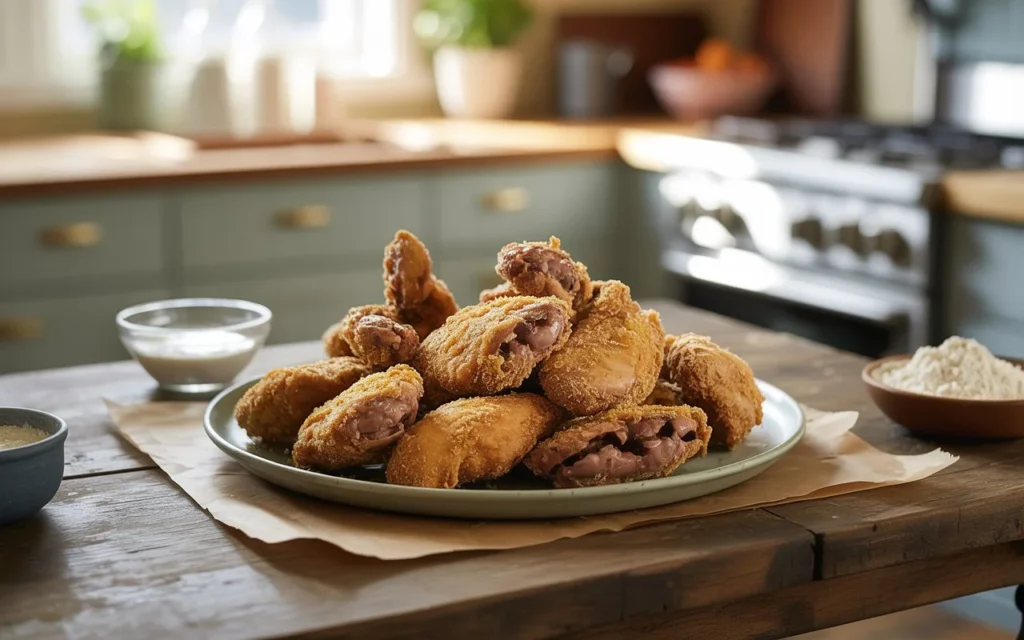
Step 6: The Frying Magic
Carefully lower the coated livers into the hot oil, working in batches of 6-8 pieces (don’t overcrowd the pot or the temperature will drop). Fry for 3-4 minutes, until they’re deep golden brown and crispy. The internal temperature should reach 165°F.
Use a slotted spoon or spider to transfer the finished livers to your prepared draining station. Season immediately with a light sprinkle of salt while they’re still hot – this helps the seasoning stick to the crispy coating.
Step 7: The Final Touch
Let the livers rest for about 2-3 minutes before serving. This brief resting period allows the juices to redistribute, ensuring each bite is tender and flavorful rather than dry.
Nutritional Information
As someone who believes in balanced, mindful eating, I think it’s important to understand what we’re putting into our bodies. Here’s the nutritional breakdown for this recipe (serves 4-6):
Per Serving (approximately 4 oz):
- Calories: 385
- Protein: 28g
- Carbohydrates: 22g
- Fat: 18g
- Iron: 12mg (67% daily value)
- Vitamin A: 4,950 IU (99% daily value)
- Folate: 345mcg (86% daily value)
- Vitamin B12: 16.5mcg (275% daily value)
One thing that always surprises people is just how nutrient-dense chicken livers are. They’re packed with iron, B vitamins, and vitamin A – nutrients that many of us don’t get enough of in our regular diets. When my teenage daughter was diagnosed with low iron levels, our family doctor actually recommended incorporating organ meats like liver into our meal rotation.
The key to making this indulgent dish part of a healthy lifestyle is portion control and balancing it with plenty of vegetables and lighter sides. I typically serve about 4 ounces per person alongside a big green salad and roasted vegetables.
Healthier Alternatives for the Recipe
Over the years, I’ve developed several modifications to make this recipe work for different dietary needs and health goals. When my brother-in-law was diagnosed with diabetes, I created a version that works beautifully for low-carb eating.
For Lower Carb: Replace the flour coating with a mixture of finely ground pork rinds, parmesan cheese, and almond flour. The texture is surprisingly similar, and the flavor is incredible. I discovered this combination when my keto-following neighbor challenged me to create a version she could enjoy.
For Air Fryer Cooking: You can absolutely make these in an air fryer at 380°F for about 12-15 minutes, flipping halfway through. Spray the coated livers lightly with cooking oil for the best results. This method reduces the oil content significantly while still delivering great flavor and texture.
For Gluten-Free Needs: Substitute the all-purpose flour with a blend of rice flour (1 cup), tapioca starch (1/2 cup), and potato starch (1/2 cup). Add an extra teaspoon of salt to compensate for flavor differences.
For Heart-Healthy Options: While these will always be an indulgent treat, you can reduce saturated fat by using avocado oil for frying and serving smaller portions alongside fiber-rich sides like roasted Brussels sprouts or a quinoa salad.
Serving Suggestions
This is where the fun really begins! Fried chicken livers are incredibly versatile, and I’ve served them successfully at everything from casual weeknight dinners to special holiday gatherings.
Classic Southern Style: Serve over creamy grits with sautéed onions and a drizzle of hot sauce. This combination takes me straight back to Sunday dinners at my grandmother’s table, where three generations would gather to share stories and incredible food.
Modern Comfort Food: I love serving these over buttermilk mashed potatoes with honey-glazed carrots and green beans. The creamy potatoes provide the perfect backdrop for the crispy, flavorful livers.
Salad Topper: For a lighter meal, I’ll slice the cooked livers and serve them warm over mixed greens with cherry tomatoes, cucumber, and a tangy vinaigrette. This combination works especially well for lunch when I want something satisfying but not too heavy.
Breakfast Hash: Chop the leftover livers and fold them into breakfast potatoes with bell peppers and onions. Top with a fried egg, and you’ve got a hearty weekend breakfast that’ll keep you satisfied for hours.
Game Day Appetizer: Serve them with toothpicks alongside homemade ranch dressing and pickled jalapeños. Even people who claim they don’t like liver end up going back for seconds when they’re presented this way.
For beverages, I typically serve sweet tea, lemonade, or sparkling water with fresh mint. The acidity helps cut through the richness of the fried coating beautifully.
Common Mistakes to Avoid
After years of making this recipe and teaching it to friends and family, I’ve seen the same mistakes pop up repeatedly. Let me save you from some of the disasters I’ve witnessed (and caused myself!).
Mistake #1: Skipping the Marinating Time I get it – when you’re hungry, waiting 2-4 hours feels like forever. But I promise you, this step is non-negotiable. The first time I made this recipe, I was running late for a dinner party and only marinated for 30 minutes. The result was tough, less flavorful livers that didn’t do justice to this incredible dish.
Mistake #2: Using the Wrong Oil Temperature Too many home cooks guess at oil temperature instead of using a thermometer. I learned this lesson when I ruined an entire pound of livers by frying them in oil that was too cool – they turned out greasy and soggy, with coating that fell right off.
Mistake #3: Overcrowding the Pan It’s tempting to fry everything at once to speed up the process, but overcrowding drops the oil temperature dramatically and prevents proper browning. Be patient and work in small batches for the best results.
Mistake #4: Not Properly Cleaning the Livers Those white membranes and any green spots absolutely must be removed, or you’ll end up with bitter, tough results. Take the time to examine each piece carefully.
Mistake #5: Over-seasoning the Coating The buttermilk marinade does a lot of the flavoring work, so don’t go overboard with the coating seasonings. I made this mistake during my early experiments and ended up with livers that were so salty they were nearly inedible.
Storing Tips for the Recipe
Proper storage is key to enjoying this recipe throughout the week, and I’ve developed a system that works perfectly for my busy family schedule.
Refrigerator Storage: Cooked fried chicken livers will keep in the refrigerator for up to 3 days when stored in an airtight container. I line the container with paper towels to absorb any excess moisture, which helps maintain the coating’s texture.
Reheating for Best Results: Never use the microwave – it makes the coating soggy and ruins all your hard work! Instead, reheat in a 350°F oven for 8-10 minutes, or use an air fryer at 350°F for 3-4 minutes. The coating will crisp back up beautifully.
Prep-Ahead Tips: You can marinate the livers up to 24 hours in advance, which actually improves the flavor. The coated (but not yet fried) livers can be stored in the refrigerator for up to 4 hours before cooking.
Freezing Options: While I don’t typically recommend freezing cooked fried foods, you can freeze the marinated, uncoated livers for up to 3 months. Thaw completely in the refrigerator before coating and frying.
Meal Prep Strategy: Every other Sunday, I’ll prepare a double batch and use the leftovers throughout the week in salads, hash, or as protein additions to other dishes. This approach saves time and ensures we always have a quick, protein-rich option available.
FAQs
Over the years, I’ve received hundreds of questions about this recipe through social media and my blog comments. Here are the most common concerns I hear from readers:
Q: “My coating always falls off during frying. What am I doing wrong?”
This usually happens when the livers aren’t properly dried before coating, or when the oil temperature is incorrect. Make sure you pat the livers dry after marinating (but don’t shake off all the buttermilk), and double-check your oil temperature with a thermometer.
Q: “How can I tell when the livers are properly cooked?”
The internal temperature should reach 165°F, and they should be golden brown on the outside. If you cut into one, the center should be slightly pink but not bloody. Overcooked livers become grainy and tough, so don’t go beyond the proper temperature.
Q: “Can I use frozen chicken livers?” Absolutely! Just make sure they’re completely thawed and patted dry before starting the marinating process. Frozen livers often release more moisture, so you might need to extend the draining time slightly.
Q: “My family thinks liver tastes too ‘metallic.’ Any suggestions?”
This is often due to improper cleaning or old livers. Make sure you’re buying fresh livers from a reputable source, and soak them in cold milk for 30 minutes before starting the buttermilk marinade. This extra step helps mellow any strong flavors.
Q: “Is there a way to make this recipe less messy?”
Set up your coating station with shallow dishes and use one hand for wet ingredients, one for dry. Keep a damp towel nearby for wiping your hands between steps. Also, using a deep, heavy pot instead of a shallow pan reduces oil splatter significantly.
Q: “Can children safely eat chicken livers?”
Yes, but in moderation due to the high vitamin A content. I typically serve smaller portions to my kids (about 2 ounces) and always make sure they’re cooked to the proper temperature.
Conclusion
These fried chicken liver recipes represent so much more than just a cooking technique – they’re a connection to culinary traditions, family memories, and the joy of transforming simple ingredients into something truly special. The key to success lies in proper preparation, patience with the marinating process, and maintaining the correct oil temperature throughout cooking.
Whether you’re continuing a family tradition or trying liver for the first time, this recipe delivers crispy, flavorful results that even skeptics will enjoy. The combination of buttermilk tenderness and perfectly seasoned coating creates a dish that’s both comforting and sophisticated.
If you enjoyed this recipe, make sure to subscribe to my blog for more authentic Southern comfort food recipes and family cooking tips. There’s nothing I love more than helping fellow home cooks create memorable meals that bring families together around the dinner table.
Happy cooking, y’all!