
My Love Affair with Comfort Food Started Here
That night, I created what has now become our family’s go-to comfort meal – this incredible Chicken Pot Pie Recipe Pillsbury that comes together in under an hour and tastes like you’ve been cooking all day. Trust me, I’ve made this recipe at least thirty times since that first chaotic Tuesday, and it never fails to bring everyone to the table with smiles on their faces.
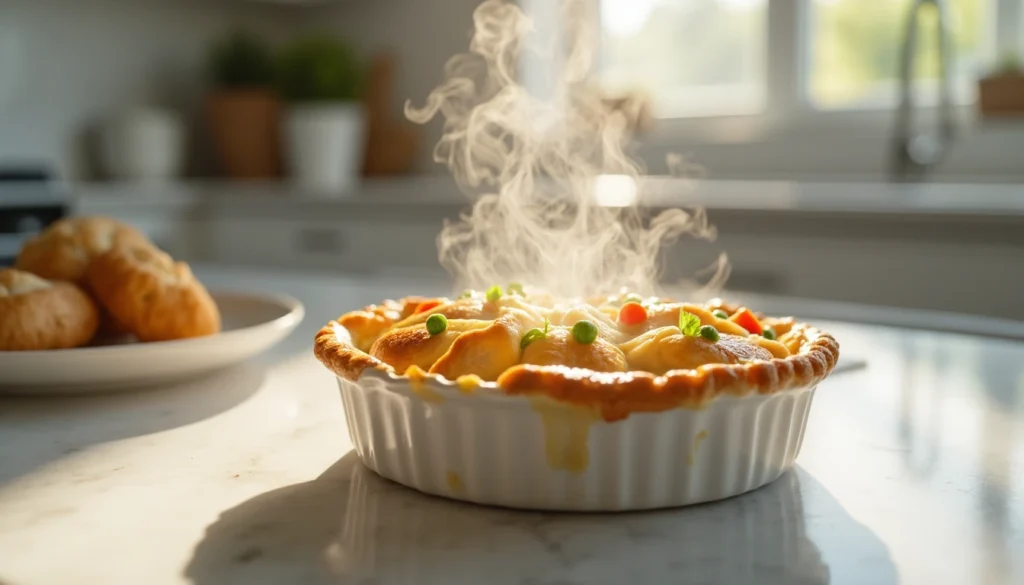
Have you ever wondered how some meals just seem to wrap your whole family in warmth? This pot pie is exactly that kind of magic. The flaky, golden crust combined with that creamy, herb-infused filling creates the kind of comfort food that makes even the most challenging days feel manageable.
Table of Contents
Ingredients You’ll Need
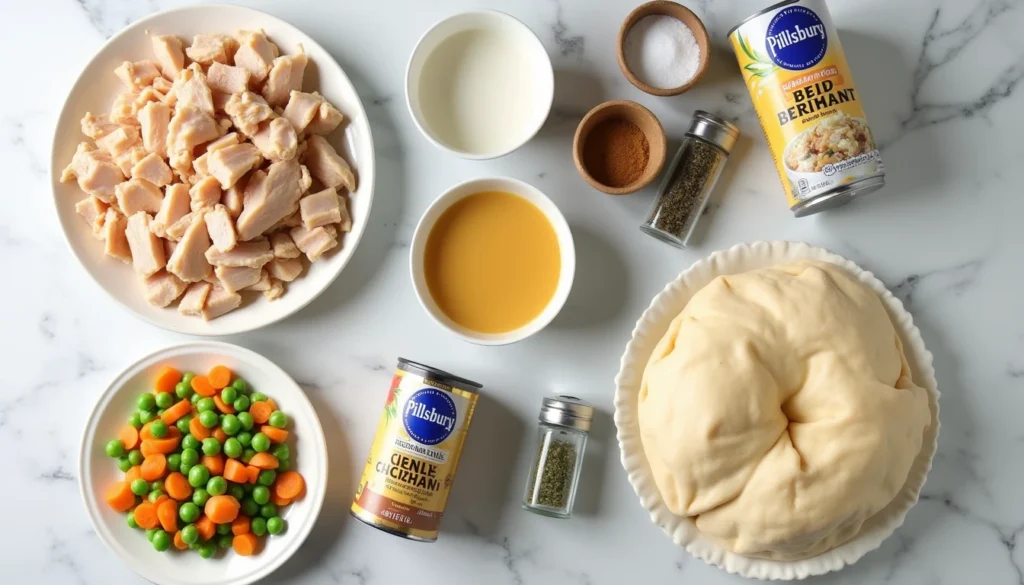
Here’s what you’ll gather for this soul-warming dish – and trust me, most of these ingredients are probably already hanging out in your kitchen:
For the Filling:
- 2 cups cooked chicken, diced (I love using rotisserie chicken for this – it’s my secret weapon for busy nights!)
- 1 bag (12 oz) frozen mixed vegetables (peas, carrots, corn, green beans)
- 1 can (10.75 oz) condensed cream of chicken soup
- 1/2 cup whole milk (I’ve tried this with 2% milk too, and it works beautifully)
- 1 teaspoon dried thyme (the earthy aroma when you sprinkle this in is absolutely divine)
- 1/2 teaspoon garlic powder
- 1/2 teaspoon onion powder
- Salt and freshly ground black pepper to taste
- 2 tablespoons butter
For the Crust:
- 1 box (15 oz) Pillsbury refrigerated pie crusts (2 crusts)
- 1 egg, beaten (for that gorgeous golden finish)
I have to share a little secret with you – I discovered the most amazing thyme at our local farmer’s market in downtown Portland last summer. The vendor told me it was grown just twenty miles outside the city, and the flavor is so much more intense than what I used to buy at the grocery store. But honestly, regular dried thyme from your spice cabinet works perfectly fine too!
Timing Breakdown
Here’s the beautiful thing about this recipe – it’s designed for real life, not Instagram perfection:
- Prep Time: 15 minutes
- Cook Time: 35-40 minutes
- Total Time: 50-55 minutes
I typically start this recipe around 5:30 PM on weeknights, and we’re sitting down to eat by 6:30. It’s become my saving grace for those evenings when I need something comforting but don’t have hours to spend in the kitchen. Sunday afternoons are perfect for this too – I’ll often make two and freeze one for later in the week.
Step-by-Step Instructions
Step 1: Preheat and Prep Your Workspace
Preheat your oven to 425°F. I learned this tip from my neighbor Sarah – always preheat first because there’s nothing worse than having your beautiful pot pie ready to go and realizing your oven isn’t hot enough yet!
Take your pie crusts out of the refrigerator and let them come to room temperature while you prepare the filling. This makes them so much easier to work with, and you’ll avoid those frustrating tears that used to happen to me all the time.
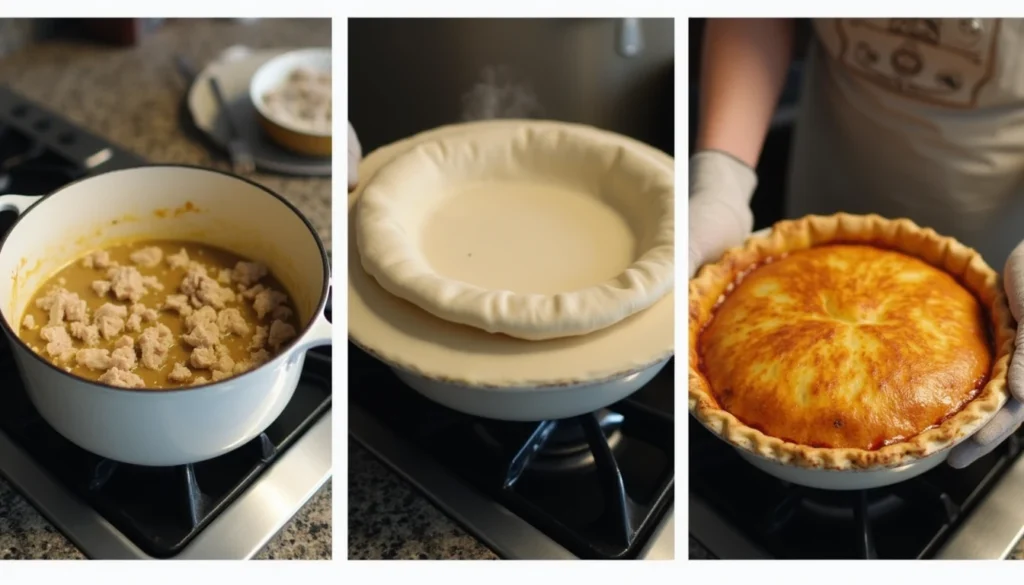
Step 2: Create the Heart of Your Pot Pie
In a large saucepan over medium heat, melt the butter. The gentle sizzling sound it makes is like music to my ears – it means comfort food is on the way! Add your frozen vegetables (no need to thaw them first) and cook for about 3-4 minutes, stirring occasionally.
Here’s where the magic really begins: add your diced chicken, cream of chicken soup, milk, thyme, garlic powder, onion powder, salt, and pepper. Stir everything together and let it simmer for 5-7 minutes until the mixture thickens slightly. The aroma that fills your kitchen during this step is absolutely incredible – it reminds me of Sunday dinners at my grandmother’s house in Ohio.
Step 3: Assemble Your Masterpiece
Roll out one pie crust and gently press it into a 9-inch pie dish. I used to struggle with getting the crust to cooperate, but then my friend Maria taught me to roll from the center outward, turning the dough a quarter turn every few rolls. Game changer!
Pour your chicken and vegetable mixture into the crust-lined pie dish. Don’t worry if it seems like a lot of filling – that’s exactly what you want. Cover with the second pie crust, and here’s a crucial step I learned the hard way: crimp the edges really well to seal in all that delicious filling.
Step 4: The Finishing Touches
Cut several small slits in the top crust to allow steam to escape (I usually make about 6-8 small cuts in a decorative pattern). Brush the entire top with beaten egg – this is what gives you that beautiful, golden-brown finish that makes everyone think you’re a culinary genius.
Trust me, don’t skip the egg wash! The first time I made this recipe, I was in such a hurry that I forgot this step, and while it still tasted amazing, it didn’t have that bakery-perfect appearance.
Step 5: Bake to Golden Perfection
Bake for 30-35 minutes, or until the crust is golden brown and the filling is bubbling. I always set my timer for 30 minutes and then keep a close eye on it. Every oven is different – mine runs a little hot, so I sometimes need to cover the edges with foil during the last 10 minutes to prevent over-browning.
Let it cool for about 10 minutes before serving. I know it’s tempting to dive right in (believe me, I’ve burned my tongue more times than I care to admit), but this resting time helps the filling set up beautifully.
Nutritional Information
As someone who believes in enjoying life’s delicious moments while still maintaining a balanced approach to eating, I always like to share the nutritional breakdown of my recipes:
Per Serving (serves 6):
- Calories: 485
- Protein: 22g
- Carbohydrates: 38g
- Fat: 26g
- Fiber: 3g
- Sodium: 820mg
- Calcium: 45mg
- Iron: 2.8mg
What I love about this recipe is how it provides a good balance of protein from the chicken, carbohydrates for energy, and vegetables for essential vitamins and minerals. It’s definitely a comfort food, but it’s also nourishing – the kind of meal that satisfies both your soul and your body’s nutritional needs.
Healthier Alternatives for the Recipe
Over the years, I’ve experimented with several modifications to make this recipe work for different dietary needs in my family and friend circle:
For a Lighter Version: Replace the cream of chicken soup with a reduced-sodium version, and use low-fat milk instead of whole milk. I’ve also had great success using Greek yogurt mixed with a little chicken broth in place of some of the soup – it adds protein and creates an incredibly creamy texture.
Gluten-Free Option: My dear friend Jessica has celiac disease, so I developed a version using gluten-free pie crust. The filling is naturally gluten-free if you use a gluten-free cream soup. I’ve found that the Pillsbury gluten-free pie crust works wonderfully, though it requires a slightly gentler touch when rolling.
Dairy-Free Adaptation: When my sister discovered her lactose intolerance, I learned to substitute the milk with unsweetened almond milk and use dairy-free butter. The texture is remarkably similar, and the flavor is still incredibly satisfying.
Vegetable-Forward Version: For a lighter twist, I sometimes add extra vegetables like diced bell peppers, mushrooms, or even some fresh spinach. My teenage daughter actually prefers this version – she says it makes her feel less guilty about having seconds!
Serving Suggestions
This pot pie is absolutely delicious on its own, but I love pairing it with a few simple sides that complement rather than compete with its rich, comforting flavors:
My Favorite Combinations: A simple mixed green salad with a light vinaigrette cuts through the richness beautifully. I toss together baby spinach, arugula, and whatever fresh herbs I have on hand – usually parsley or chives from my little herb garden on the kitchen windowsill.
Roasted Brussels sprouts with a touch of balsamic glaze make an elegant side dish that even my Brussels sprouts-skeptical husband enjoys. The slight bitterness balances the creamy richness of the pot pie perfectly.
For Special Occasions: Last Thanksgiving, when we had a smaller gathering due to family traveling, I served individual pot pies made in ramekins alongside roasted root vegetables. It felt both festive and cozy – exactly the mood we were going for.
Kid-Friendly Additions: When I’m serving this to my children’s friends, I’ll often add a side of homemade applesauce or some fresh fruit. Kids seem to love the sweet contrast, and parents appreciate that there’s something fresh and light on their plates too.
Common Mistakes to Avoid
Let me save you from some of the kitchen disasters I’ve experienced over the years! Here are the most common pitfalls I see (and have definitely fallen into myself):
The Soggy Bottom Syndrome: This used to happen to me all the time until I learned to pre-bake the bottom crust for just 5-7 minutes before adding the filling. It creates a barrier that prevents the crust from getting soggy, especially if your filling is particularly moist.
Overfilling Disaster: The first time I made this recipe, I was so excited about all the delicious filling that I packed way too much into the pie dish. The result? A beautiful pot pie explosion in my oven and a serious cleaning session afterward. Now I know that if I have extra filling, I’ll just make individual pot pies in ramekins.
The Impatience Factor: I cannot stress this enough – let the pie cool for at least 10 minutes before cutting into it! I learned this lesson the hard way when I served what looked like chicken pot pie soup to my in-laws during their first visit to our new house. They were gracious about it, but I was mortified!
Crust Cracking Crisis: If your pie crust is too cold, it will crack when you try to roll it. If it’s too warm, it will be sticky and difficult to handle. Room temperature is your sweet spot – about 15-20 minutes out of the fridge is perfect.
Storing Tips for the Recipe
One of the things I love most about this recipe is how well it keeps and reheats – perfect for my meal-prep Sundays!
Refrigerator Storage: Leftover pot pie will keep beautifully in the refrigerator for up to 4 days. I cover it tightly with plastic wrap or transfer portions to individual containers. When reheating, I cover it with foil and warm it in a 350°F oven for about 15-20 minutes, or until heated through.
Freezer-Friendly Options: This recipe freezes wonderfully! I often make two at once – one for dinner that night and one for the freezer. Wrap the unbaked pot pie tightly in plastic wrap, then aluminum foil, and it will keep for up to 3 months. When you’re ready to bake it, no need to thaw – just add an extra 10-15 minutes to the baking time and cover with foil if the crust browns too quickly.
Make-Ahead Magic: The filling can be prepared up to two days in advance and stored in the refrigerator. This is perfect for holiday entertaining when you want to get some of the prep work done ahead of time. Just assemble and bake when you’re ready to serve.
Individual Portion Prep: I’ve started making individual pot pies in mason jars for easy grab-and-go lunches. They reheat perfectly in the microwave and make portion control so much easier!
Frequently Asked Questions
Can I use fresh vegetables instead of frozen?
Absolutely! My neighbor Tom grows the most incredible vegetables in his backyard garden, and I love using his fresh peas and carrots when they’re in season. Just sauté them for a few extra minutes to ensure they’re tender before adding the other ingredients.
What if I don’t have rotisserie chicken?
No problem at all! You can use any cooked chicken – leftover roasted chicken, poached chicken breasts, or even chicken thighs work beautifully. I’ve even used leftover turkey after Thanksgiving, and it was absolutely delicious.
My pie crust keeps shrinking. What am I doing wrong?
This used to frustrate me so much! The key is not to stretch the dough when you’re placing it in the pie dish. Let it relax and naturally drape into the dish. Also, chilling the assembled pie for 15 minutes before baking can help prevent shrinkage.
Can I make this recipe dairy-free?
Yes! I’ve successfully made this for my lactose-intolerant friends using coconut milk instead of regular milk and dairy-free butter. The flavor is slightly different but still absolutely delicious.
How do I know when it’s done baking?
The crust should be golden brown and the filling should be bubbling when you peek through the steam vents. If you’re unsure, a knife inserted through one of the vents should come out hot to the touch.
Can I add other vegetables?
Of course! I love experimenting with different vegetable combinations. Mushrooms, bell peppers, and even some diced potatoes work wonderfully. Just make sure any additions are pre-cooked if they need extra time to become tender.
A Recipe That Brings Families Together
This Pillsbury Chicken Pot Pie Recipe has become so much more than just a dinner solution in our house – it’s become a symbol of comfort, family time, and the magic that happens when simple ingredients come together with a little love and attention.
The beauty of this recipe lies not just in its incredible flavor or its under-an-hour timeline, but in its ability to transform an ordinary weeknight into something special. Whether you’re feeding a hungry family after a long day, hosting friends for a casual dinner, or simply craving the kind of comfort food that makes everything feel okay, this pot pie delivers every single time.
Don’t forget to leave a comment below sharing how your pot pie turned out, and if you loved this recipe as much as my family does, please consider subscribing to my blog for more comforting, family-friendly recipes that make everyday cooking feel special. Until next time, happy cooking, dear friends!
Remember, the best recipes aren’t just about following directions – they’re about creating memories, sharing love, and bringing people together around the table. This pot pie does exactly that, one delicious bite at a time.