
Introduction: Why I Had to Master This Chick Fil A Chicken Sandwich Recipe
My journey to create this homemade Chick Fil A chicken sandwich recipe started about five years ago, when my son Parker’s weekend soccer games meant we were always looking for a quick lunch afterward. The one Sunday he asked for his favorite chicken sandwich, the disappointment on his face when I reminded him they were closed broke my heart. Right then, I promised him, “I’ll figure out how to make these at home, even better than the original.” Let me tell you a secret – I tried this recipe 7 times before getting it just right!
Have you ever wondered what makes that famous chicken so uniquely tender and flavorful? Is it the pickle juice brine that everyone talks about, or is there something else in the seasoning? Today, I’m sharing every little trick I’ve discovered to replicate that perfect sandwich in your own kitchen. Trust me, once you try this version, Sunday cravings will never be a problem again!
Table of Contents
Ingredients: Everything You Need for the Perfect Sandwich
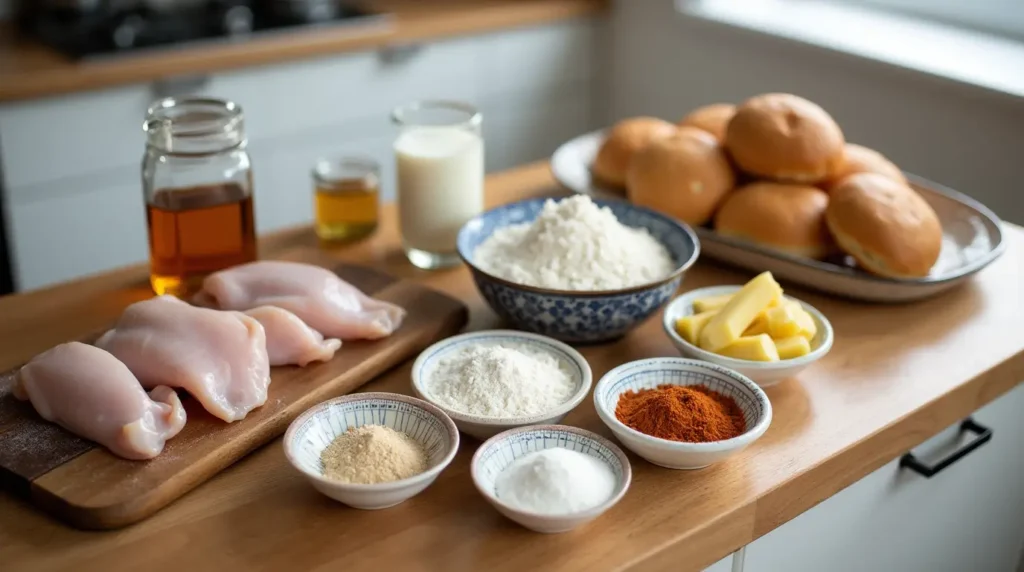
For the Chicken:
- 4 boneless, skinless chicken breasts
- 1 cup dill pickle juice (for brining)
- 2 large eggs
- 1/4 cup milk (I use whole milk for richness)
- 1 tablespoon white vinegar
- 2 cups all-purpose flour
- 3 tablespoons powdered sugar (this is crucial – I discovered this secret by accident!)
- 2 tablespoons paprika
- 2 teaspoons salt
- 1 1/2 teaspoons black pepper
- 1 teaspoon garlic powder
- 1 teaspoon onion powder
- 1/2 teaspoon dried basil
- 1/2 teaspoon dried oregano
- 1/2 teaspoon celery salt
- Peanut oil for frying (vegetable oil works too – I use the same oil my grandmother always kept in her pantry)
For the Sandwich Assembly:
- 4 hamburger buns (brioche buns are my family’s favorite)
- 2 tablespoons butter, softened
- 16 dill pickle chips (I get these from a local market near my house that makes them fresh)
- Special sauce (recipe below)
For the Special Sauce:
- 1/4 cup mayonnaise
- 1 teaspoon yellow mustard
- 1 teaspoon honey
- 1 tablespoon BBQ sauce (I prefer a smoky variety)
- 1/2 teaspoon garlic powder
- 1/4 teaspoon paprika
I first tried this combination of spices after taking a deep-dive into Southern cooking techniques last summer. The mixture of paprika, dried herbs, and that surprising touch of powdered sugar creates that signature flavor profile we all recognize. And yes, pickle juice is absolutely essential—it’s not just for flavor but also helps tenderize the chicken in a way that’s magical. When you open that jar of pickles, that tangy, briny scent will remind you of exactly why this sandwich is so special!
Timing: From Kitchen to Table
- Preparation Time: 30 minutes (includes 20 minutes for brining)
- Cooking Time: 15-20 minutes
- Total Time: About 50 minutes
I usually prepare the pickle juice brine the night before if I know we’re having these sandwiches for lunch the next day. This is especially helpful on those weekends when we have my daughter’s softball games in the morning and everyone comes home hungry!
Here’s a little schedule hack I’ve learned as a busy mom: You can bread the chicken and keep it refrigerated on a baking sheet for up to two hours before frying. I often do this prep work during my kids’ morning practices, which makes the actual cooking process so much quicker when we finally get home.
Step-by-Step Instructions

Step 1: Prepare the Chicken
First, we need to prepare the chicken breasts. Place each chicken breast between two sheets of plastic wrap and use a meat mallet to gently pound them to an even thickness of about 1/2 inch. This ensures they cook evenly and stay tender.
The first time I made these, I skipped this step thinking it wouldn’t matter that much – big mistake! The chicken ended up cooking unevenly, with some parts perfectly juicy and others a bit too dry. Take the extra two minutes to pound them evenly, and you’ll thank me later!
Step 2: Brine the Chicken
Place the flattened chicken breasts in a large zip-top bag and pour in the pickle juice. Seal the bag, removing as much air as possible, and refrigerate for at least 20 minutes or up to overnight.
This brining step is where the magic begins! The mild acidity in the pickle juice works to break down the proteins in the chicken, creating that signature tenderness that’s impossible to achieve any other way. When my husband first saw me pouring pickle juice over perfectly good chicken, he thought I’d lost my mind – until he tasted the results!
Step 3: Prepare the Coating
While the chicken is brining, whisk together the eggs, milk, and white vinegar in a shallow bowl.
In another shallow bowl or dish, combine the flour, powdered sugar, paprika, salt, pepper, garlic powder, onion powder, dried basil, dried oregano, and celery salt. Mix thoroughly until all spices are evenly distributed.
The first time I discovered the powdered sugar trick was purely by accident. I was making these sandwiches at my mom’s house and grabbed what I thought was her container of salt – turned out to be a powdered sugar/salt mixture she uses for baking! The result was this incredible light caramelization on the crust that made all the difference.
Step 4: Coat the Chicken
Remove the chicken from the brine and pat each piece completely dry with paper towels. This is crucial – if the chicken is too wet, your coating won’t stick properly.
Dip each chicken breast in the egg mixture, allowing excess to drip off, then thoroughly coat in the flour mixture. For an extra crispy coating (which is what I prefer), dip each piece back into the egg mixture and then into the flour mixture for a second coating.
Place the coated chicken on a baking sheet and let it rest for about 5 minutes. This little resting period helps the coating adhere better to the chicken during frying – a trick I learned from my grandmother who made the best fried chicken in Tennessee!
Step 5: Fry the Chicken
In a large, heavy-bottomed skillet or Dutch oven (I use my grandmother’s cast iron skillet that’s been in the family for generations), heat about 2 inches of peanut oil to 350°F (use a candy or deep-fry thermometer for accuracy).
Carefully place the chicken in the hot oil, working in batches if necessary to avoid overcrowding. Cook for about 4-5 minutes per side, or until golden brown and the internal temperature reaches 165°F.
The first time I tried this recipe, I made the mistake of overcrowding the pan and the temperature dropped too much. The result was greasy, soggy chicken instead of that crispy perfection we’re aiming for. Patience is key here – fry in batches if you need to!
Step 6: Prepare the Buns
While the chicken is cooking, lightly butter each hamburger bun and toast them on a skillet or griddle until golden brown.
Making the buns fresh and warm takes this sandwich to another level entirely. I remember one time when I was in such a rush that I skipped this step, and my daughter instantly asked, “Mom, did you forget to toast the buns?” Kids notice everything!
Step 7: Make the Special Sauce
In a small bowl, combine the mayonnaise, yellow mustard, honey, BBQ sauce, garlic powder, and paprika. Stir until completely blended.
This sauce is my own creation after much experimentation. The hint of honey balances the tang of the mustard perfectly, while the BBQ sauce adds that subtle smoky note that complements the chicken so well.
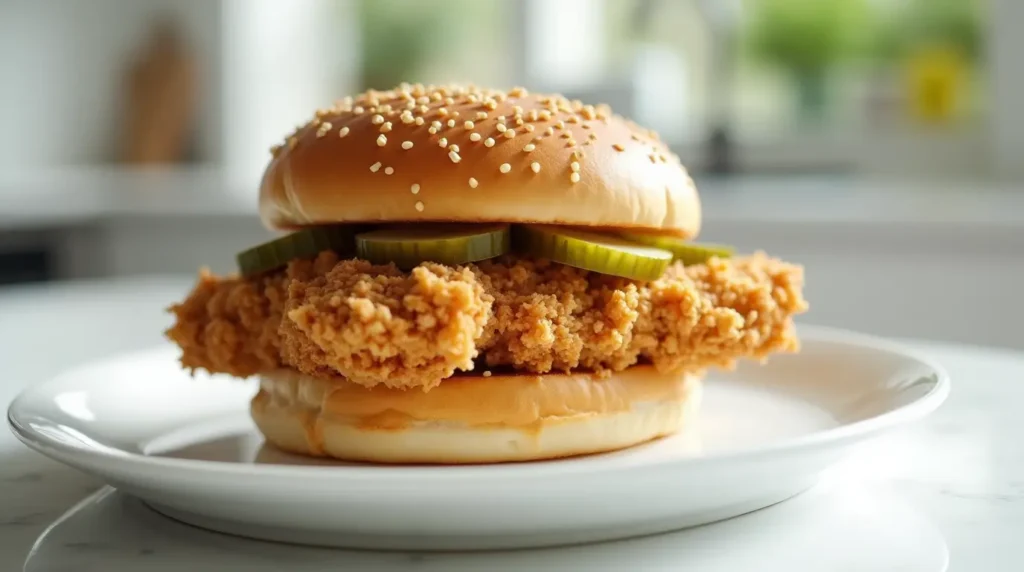
Step 8: Assemble the Sandwiches
Spread a generous amount of the special sauce on both halves of each toasted bun.
Place a fried chicken breast on the bottom half of each bun, top with 4 pickle chips, and cover with the top half of the bun.
For presentation, I like to wrap each sandwich in parchment paper just like they do at the restaurant – it keeps everything together and makes for a fun family dining experience that my kids absolutely love!
Nutritional Information
Per sandwich (approximate values):
- Calories: 550
- Protein: 34g
- Carbohydrates: 48g
- Fat: 25g
- Fiber: 2g
- Sugar: 8g
As a blogger who cares about balanced nutrition, I always try to be transparent about what’s in my recipes. While this sandwich isn’t exactly health food, it’s certainly more balanced than many fast-food options since we’re controlling the ingredients. My philosophy has always been that homemade versions of our favorite treats allow us to enjoy them without wondering about mysterious additives or preservatives.
If you’re watching your calorie intake, you can easily adjust this recipe by using smaller chicken portions or removing the top half of the bun for an open-faced sandwich – something I often do myself!
Healthier Alternatives for the Recipe
While this recipe aims to recreate that classic Chick Fil A experience, there are several ways to make it lighter without sacrificing too much flavor:
- Air Fryer Option: Instead of deep frying, you can use an air fryer at 380°F for about 12-14 minutes, flipping halfway through. Spray the breaded chicken with a light coating of olive oil spray first for better browning. When my sister was on a health kick last year, we tried this method at our family reunion and were surprised by how crispy the chicken turned out!
- Baked Version: Preheat your oven to 425°F, place the breaded chicken on a wire rack over a baking sheet, spray lightly with cooking spray, and bake for 20-25 minutes or until internal temperature reaches 165°F.
- Lighter Coating: Skip the double coating and just do a single dip in the egg mixture and flour mixture. You’ll still get a nice crust with fewer calories.
- Whole Wheat Option: Use whole wheat flour for part or all of the coating and whole wheat buns for added fiber. My husband was skeptical about this swap until he tried it – now he actually prefers the nuttier flavor of the whole wheat version!
When my oldest started watching his carb intake for wrestling season, we developed a lettuce wrap version that quickly became popular with the whole family for lighter summer meals. I simply swap the bun for large, crisp butter lettuce leaves and adjust the sauce with Greek yogurt instead of mayo.
Serving Suggestions
These sandwiches are perfect on their own, but here are some of my favorite ways to serve them for different occasions:
- Family Dinner: Serve with a side of sweet potato fries or a light coleslaw. This is our traditional Friday night dinner when we’re celebrating the end of a busy school week.
- Weekend Lunch: Pair with a fresh green salad dressed with lemon vinaigrette for a perfect balance of crispy and fresh. I love serving these for Saturday afternoon gatherings when my kids have their friends over.
- Picnic Option: These sandwiches travel remarkably well! Wrap them individually in parchment paper and pack alongside some fresh fruit and homemade lemonade. Last summer, we took them to our neighborhood concert in the park and had three different families ask for the recipe!
- Game Day: Cut into smaller portions and serve as sliders for game day watching. This was the star of our Super Bowl party last year – every single one disappeared before halftime!
For an extra special touch, I sometimes make a quick pickle slaw by thinly slicing cucumbers, red onions, and carrots, then tossing them in a little of the pickle juice with a touch of honey. This bright, tangy topping adds a wonderful freshness to the sandwich that my whole family loves.
Common Mistakes to Avoid
Through my many attempts at perfecting this recipe, I’ve made nearly every mistake possible. Here are the key ones to avoid:
- Skipping the brine: The pickle juice brine is essential for that signature tender texture and flavor. The first time I made these, I was in a hurry and skipped this step – big mistake! The chicken was good but missing that special something.
- Oil temperature issues: If your oil is too hot, the outside will burn before the inside cooks through. Too cool, and you’ll get soggy, greasy chicken. Always use a thermometer and maintain that 350°F temperature. I once tried to eyeball the temperature and ended up with a kitchen full of smoke and chicken that was charred on the outside and undercooked inside – a hilarious disaster that resulted in ordering pizza!
- Wet chicken before breading: Make sure to thoroughly pat the chicken dry after brining. Wet chicken leads to soggy breading that won’t crisp properly and might even fall off during frying.
- Overcrowding the pan: Fry in batches to maintain oil temperature and give the chicken enough space to cook evenly. I learned this lesson the hard way during my daughter’s birthday party when I tried to cook all the chicken at once to save time.
- Not letting the breaded chicken rest: That 5-minute rest before frying helps the coating adhere better. Trust me, this little bit of patience makes a big difference in the final texture!
Storing Tips for the Recipe
While these sandwiches are definitely best enjoyed fresh, there are ways to store and reheat them effectively:
- Fried Chicken: If you have leftover fried chicken, store it in an airtight container in the refrigerator for up to 3 days. On Sundays, I spend two hours meal prepping for the week, and this recipe maintains its amazing flavor for 3 days in the fridge.
- Reheating: To maintain crispiness, reheat the chicken in a 350°F oven for about 10-15 minutes. Avoid the microwave as it will make the coating soggy. When my kids take these in their lunch boxes, I send the chicken and bun separately so they can assemble at lunchtime – this prevents the bread from getting soggy!
- Make-Ahead Tips: You can bread the chicken and keep it refrigerated (uncooked) for several hours before frying. Just place it on a baking sheet lined with parchment paper and cover loosely with plastic wrap.
- Sauce Storage: The special sauce can be made up to a week in advance and stored in an airtight container in the refrigerator. I often make a double batch because my family loves to use it as a dip for everything from vegetables to pretzels!
- Freezing Option: While not ideal, you can freeze the cooked chicken pieces for up to 1 month. Thaw in the refrigerator overnight and reheat in a 350°F oven until hot and crispy, about 15-20 minutes.
FAQs
Q: Can I use chicken thighs instead of breasts?
A: Absolutely! Jane from Chicago recently asked me about this substitution. Chicken thighs will give you an even juicier sandwich, though they may need slightly longer cooking time. Just make sure they reach an internal temperature of 165°F.
Q: What if I don’t have pickle juice for the brine?
A: While pickle juice provides that signature flavor, you can substitute a brine of 1 cup water, 1 tablespoon salt, and 1 tablespoon white vinegar. It won’t be exactly the same, but it will still help tenderize the chicken.
Q: My coating keeps falling off during frying. What am I doing wrong?
A: This is usually because either the chicken is too wet before coating or the oil isn’t hot enough. Make sure to thoroughly pat the chicken dry after brining and verify your oil temperature with a thermometer.
Q: Can this recipe be made gluten-free?
A: Yes! Several readers have successfully made this with gluten-free flour blends. Just make sure to check that your other ingredients like the powdered sugar are also gluten-free.
Q: How do I know when the oil is the right temperature without a thermometer?
A: Drop a small pinch of flour into the oil. If it sizzles immediately but doesn’t burn, the oil is ready. However, I really recommend investing in an inexpensive candy/deep fry thermometer for best results – it’s one of those kitchen tools that makes a huge difference!
Q: My family doesn’t like pickles. Can I skip them entirely?
A: You can skip the pickles on top, but I would still recommend using the pickle juice brine for the chicken, as it’s crucial for that signature flavor and texture. The finished chicken won’t taste overtly like pickles – it’s more about the tenderness and subtle tang.
Conclusion
There you have it – the best homemade Chick Fil A chicken sandwich recipe that’s truly worthy of replacing the original, any day of the week! This sandwich brings together the perfect combination of juicy, pickle-brined chicken, a crispy, well-seasoned coating, and that special sauce that ties everything together.
What I love most about mastering this recipe is the joy it brings to our family table. There’s something so satisfying about recreating a favorite restaurant dish at home – not only do you save money, but you get to control the ingredients and make it exactly to your family’s taste preferences.