
My Journey with This Comfort Food Classic
Have you ever bitten into a meatloaf that looked promising but turned out dry and disappointing? Trust me, I’ve been there more times than I care to admit! That’s why I’m so excited to share this meatloaf Stove Top stuffing recipe with you today. Let me tell you, I tested this recipe seven times (yes, seven!) before getting it absolutely perfect. My family didn’t complain about being taste testers, but they unanimously agreed this final version deserves a permanent spot in our dinner rotation.
What makes this meatloaf so special? The Stove Top stuffing mix isn’t just a convenient shortcut – it’s actually the secret ingredient that keeps everything incredibly moist while adding the perfect seasoning blend. It’s comfort food magic, and I can’t wait for you to try it!
Table of Contents
Ingredients You’ll Need
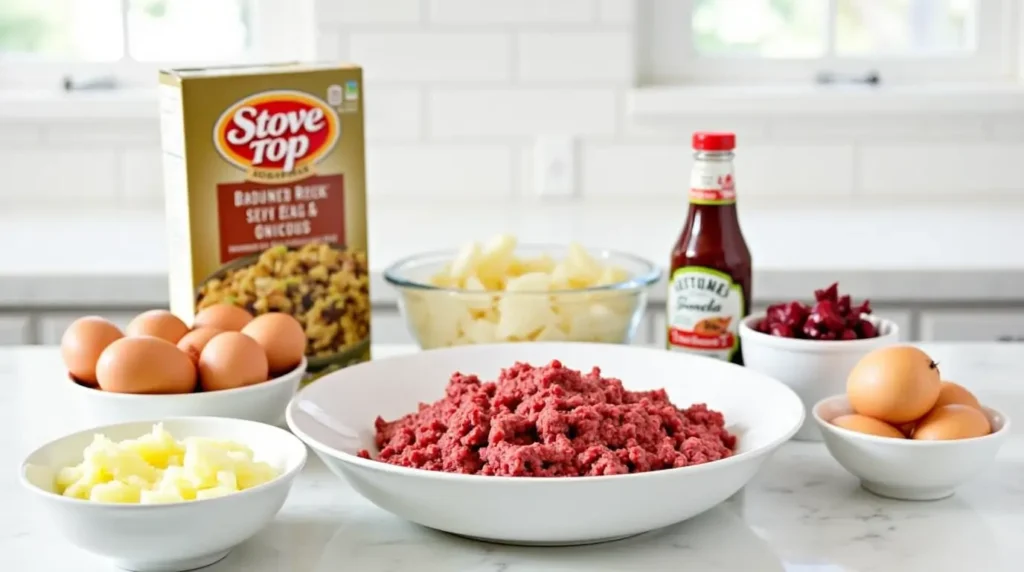
- 1½ pounds ground beef (I use 85/15 lean-to-fat ratio – the bit of fat keeps everything juicy!)
- 1 box (6 oz) Stove Top stuffing mix, chicken or savory herbs flavor (I find the herb variety at my local grocery store gives the best flavor profile)
- 1 cup water
- 2 large eggs, lightly beaten (farm-fresh if you can get them – I get mine from the farmers market when possible)
- 1 medium onion, finely diced (about 1 cup)
- 1 medium bell pepper, finely diced (about ¾ cup – I love using red for a touch of sweetness)
- 2 cloves garlic, minced (freshly minced makes such a difference in flavor!)
- ¼ cup ketchup, plus ½ cup for topping
- 1 tablespoon Worcestershire sauce
- 1 teaspoon dried Italian herbs
- ½ teaspoon black pepper
- ½ teaspoon salt (I use the sea salt my sister brought me from her California trip – but any salt works!)
For the glaze:
- ½ cup ketchup
- 2 tablespoons brown sugar
- 1 tablespoon yellow mustard
- 1 teaspoon Worcestershire sauce
You’ll notice I don’t add extra breadcrumbs – the Stove Top stuffing provides all the binding we need while keeping everything perfectly moist. If you need to make substitutions, ground turkey works wonderfully (I make this swap when my sister visits since she doesn’t eat beef). For a gluten-free version, you can use gluten-free breadcrumbs and seasoning blend instead of the Stove Top, though you’ll need to adjust the spices a bit.
Timing
Prep Time: 15 minutes (I usually chop my veggies the night before to make dinner assembly even quicker)
Cook Time: 1 hour
Total Time: 1 hour 15 minutes
This meatloaf Stove Top stuffing recipe has become my Thursday night dinner hero when soccer practice runs late and everyone walks through the door starving. I can prep it earlier in the day, refrigerate it, and then just pop it in the oven about an hour before we need to eat. The hands-on time is minimal, which is exactly what I need on our busiest days!
Step-by-Step Instructions
Step 1: Prepare Your Ingredients
Preheat your oven to 350°F (175°C) and lightly grease a 9×5-inch loaf pan.
In a large mixing bowl, combine the Stove Top stuffing mix with 1 cup of water. Let it sit for about 5 minutes to soften. The first time I made this recipe, I rushed this step and ended up with stuffing chunks that were too firm – patience here pays off!
Step 2: Sauté the Vegetables
While the stuffing softens, heat a teaspoon of olive oil in a small skillet over medium heat. Add the diced onion and bell pepper and sauté until softened, about 5 minutes. Add the minced garlic and cook for another 30 seconds until fragrant.
Trust me on this extra step – sautéing the veggies before adding them to the meatloaf mixture makes an enormous difference in the final flavor. I learned this trick from my mother-in-law, who makes the most amazing meatballs!
Step 3: Mix the Meatloaf Ingredients
To the softened stuffing mix, add the sautéed vegetables, ground beef, beaten eggs, ¼ cup ketchup, Worcestershire sauce, dried Italian herbs, salt, and pepper.
Here’s where I need you to put away your wooden spoon – mix all ingredients together using clean hands. Yes, it’s messy, but you’ll get a much better texture without overmixing! Gently combine everything until just incorporated. Overmixing leads to a tough meatloaf, and we want ours tender and delicious.
Step 4: Form the Meatloaf
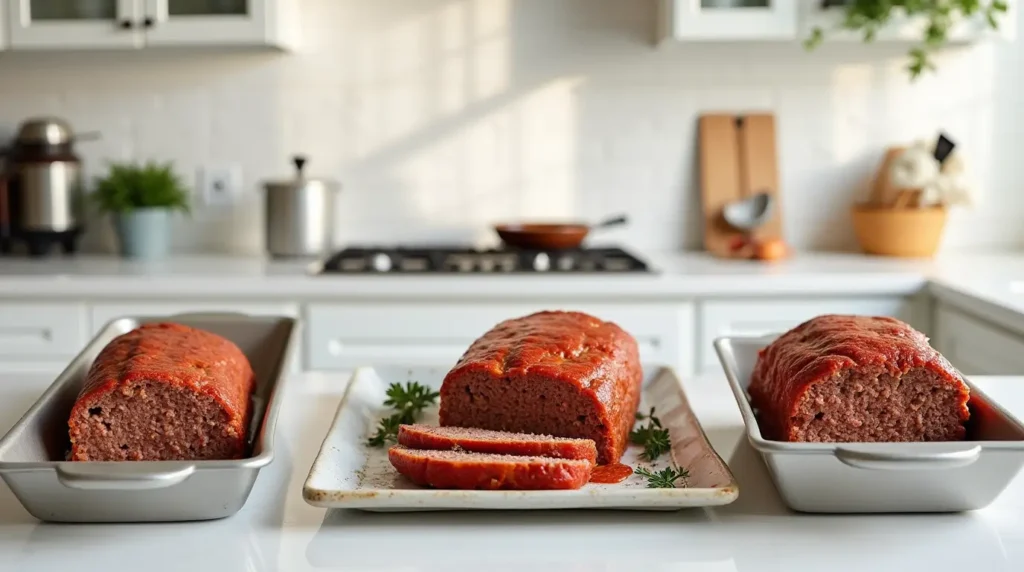
Transfer the meat mixture to your prepared loaf pan, gently pressing it into an even layer. Alternatively, you can place it on a baking sheet and form it into a loaf shape about 9 inches long and 4 inches wide.
I prefer the freeform method on a baking sheet lined with parchment paper because it allows the fat to drain away and gives more surface area for that delicious glaze we’re about to make!
Step 5: Prepare and Apply the Glaze
In a small bowl, whisk together ½ cup ketchup, brown sugar, yellow mustard, and Worcestershire sauce until well combined.
Generously brush the glaze over the top and sides of the meatloaf. This glaze caramelizes beautifully during baking and creates that classic tangy-sweet meatloaf topping that my kids always fight over.
Step 6: Bake to Perfection
Bake the meatloaf in the preheated oven for 55-60 minutes, or until an instant-read thermometer inserted into the center registers 160°F (71°C).
One mistake I made early in my meatloaf journey was not checking the internal temperature. I’d either undercook it (making everyone nervous) or overcook it (hello, dry meatloaf!). A good meat thermometer is absolutely worth the investment.
Step 7: Rest Before Serving
Once done, remove the meatloaf from the oven and let it rest for 10 minutes before slicing. I know it’s tempting to cut into it right away – the aroma will be driving everyone crazy! – but this resting time allows the juices to redistribute, ensuring each slice is moist and holds together perfectly.
Nutritional Information
I believe in knowing what goes into your body while still enjoying delicious food. Here’s the approximate nutritional breakdown per serving (assuming 8 servings):
- Calories: 320
- Protein: 23g
- Carbohydrates: 19g
- Fat: 17g
- Fiber: 1g
- Sugar: 8g
- Sodium: 750mg
As a blogger who cares about balanced nutrition, I always try to include protein and vegetables in my family meals. This meatloaf gives us a hearty serving of protein, and I typically pair it with vegetable sides to create a well-rounded dinner. The Stove Top stuffing does add some sodium, so I’m mindful about not adding too much additional salt to the recipe.
Healthier Alternatives for the Recipe
Looking to make this meatloaf even healthier? Here are some modifications I’ve tried and loved:
- Swap ground beef for lean ground turkey or chicken. When I discovered my cholesterol was creeping up last year, I started making this with ground turkey, and it’s still incredibly flavorful!
- Use whole wheat Stove Top stuffing if available, or substitute with whole grain breadcrumbs and herbs.
- Add extra vegetables – I often sneak in grated zucchini or carrots (about 1 cup). My kids have no idea they’re getting extra veggies, and the moisture makes the meatloaf even better.
- For a lower-sugar glaze, use sugar-free ketchup and reduce or eliminate the brown sugar.
- Add 2 tablespoons of ground flaxseed for extra omega-3s and fiber. I started doing this after a nutritionist friend suggested it, and it’s undetectable in the final product.
When my daughter was briefly following a dairy-free diet for health reasons, I was relieved to discover that this recipe doesn’t require any dairy products at all – making it naturally dairy-free!
Serving Suggestions
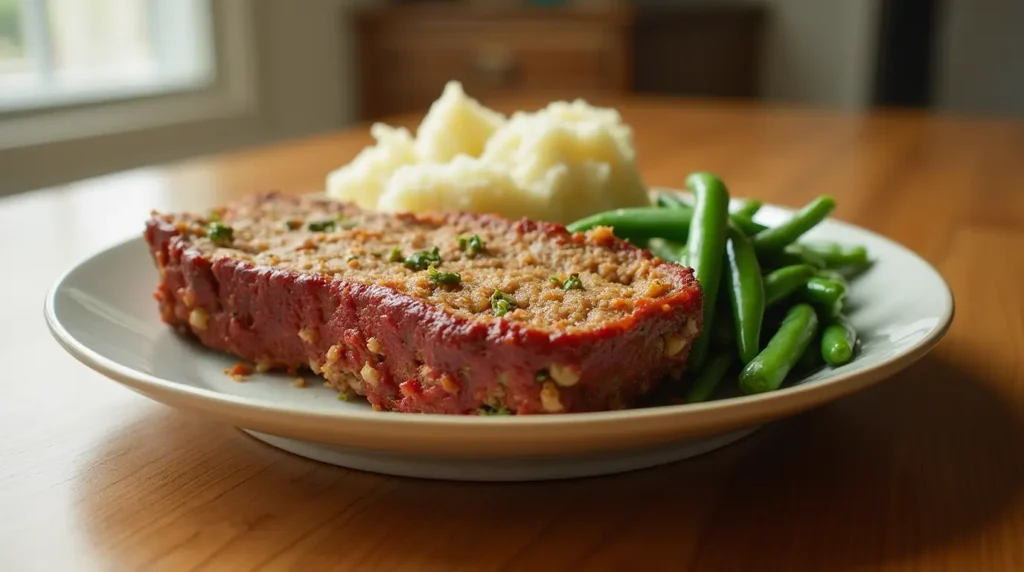
This meatloaf Stove Top stuffing recipe pairs beautifully with so many sides! Here are our family favorites:
- Creamy mashed potatoes – the classic pairing that never disappoints. My grandmother would never serve meatloaf any other way!
- Roasted Brussels sprouts with a drizzle of balsamic glaze – the slight bitterness contrasts wonderfully with the savory meatloaf.
- Buttered green beans with sliced almonds – my kids’ favorite veggie side.
- A crisp garden salad with apple cider vinaigrette – when we want something lighter.
- Sweet potato fries – this has become our Sunday dinner tradition during fall.
This meatloaf was actually the star at my son’s graduation celebration last year. I made three loaves, and not a single slice remained by the end of the party! The make-ahead potential makes it perfect for gatherings where you don’t want to be stuck in the kitchen.
For a beautiful presentation when hosting, I slice the meatloaf and arrange it on a platter with fresh herbs sprinkled on top, surrounded by roasted vegetables. It makes such a lovely family-style serving option!
Common Mistakes to Avoid
Through my many meatloaf trials and errors, I’ve learned what not to do! Here are the pitfalls to avoid:
- Overmixing the meat mixture – This creates a dense, tough texture. Mix just until ingredients are combined for the most tender results. The first meatloaf I ever made for my husband was so tough we practically needed steak knives. Lesson learned!
- Skipping the vegetable sauté – Raw onions and peppers don’t fully cook inside the meatloaf, leaving crunchy bits and sharper flavors.
- Using breadcrumbs and Stove Top stuffing – The stuffing provides enough binding power on its own. I made this mistake once and ended up with a meatloaf brick!
- Not letting the meatloaf rest – Cut too soon, and all those wonderful juices run out, leaving you with dry slices.
- Using extra lean meat only – Some fat content helps keep the meatloaf moist. My mother-in-law’s “healthy” version using 97% lean beef was like eating seasoned cardboard (don’t tell her I said that!).
- Forgetting to check internal temperature – Visual cues aren’t enough; use a meat thermometer to ensure food safety without overcooking.
My most hilarious meatloaf disaster happened during our first Thanksgiving as newlyweds. I tried making a “festive” version with cranberries mixed in… without reducing the moisture elsewhere. It turned into meatloaf soup! We still laugh about it years later.
Storing Tips for the Recipe
This meatloaf Stove Top stuffing recipe makes excellent leftovers – some of my family members actually prefer it the next day! Here’s how to store it properly:
- Refrigerator storage: Once cooled, wrap leftover meatloaf tightly in plastic wrap or store in an airtight container. It will keep for 3-4 days in the refrigerator. I slice it before storing to make reheating individual portions easier.
- Freezing: This meatloaf freezes beautifully! I wrap individual slices in plastic wrap, then in aluminum foil, and place them in a freezer bag. They’ll keep for up to 3 months. When my son left for college, I sent him with a small frozen meatloaf that he could reheat for a taste of home!
- Make ahead: You can prepare the entire meatloaf mixture up to 24 hours in advance, shape it in the pan, cover with plastic wrap, and refrigerate. Just add the glaze right before baking and add about 10 minutes to the baking time since you’re starting with a cold meatloaf.
- Reheating: For best results, reheat slices in a covered skillet with a tablespoon of water to create steam, or in the microwave at 50% power with a damp paper towel over the top to prevent drying out.
During busy school weeks, I often make a double batch on Sundays – one for dinner that night and one to freeze for the following week. It’s meal prep that doesn’t feel like meal prep!
FAQs
Can I use other flavors of Stove Top stuffing?
Absolutely! I’ve tried this with turkey, savory herbs, and traditional sage flavors, and they all work wonderfully. Katie from Portland recently asked me this question, and I told her that the chicken variety is my personal favorite for its universal appeal with picky eaters.
Can I make this recipe in a muffin tin for individual servings?
Yes! Meatloaf muffins are adorable and cook much faster! Fill greased muffin cups about ¾ full and bake at 350°F for about 20-25 minutes. My kids love these in their lunch boxes with a side of ketchup for dipping.
How can I tell when the meatloaf is done without a thermometer?
While I strongly recommend using a thermometer, another indicator is when the meatloaf starts to pull away from the sides of the pan, and the internal color is no longer pink. However, Sarah from Ohio learned the hard way (as she told me via Instagram) that color isn’t always the most reliable indicator.
My meatloaf always falls apart when slicing. What am I doing wrong?
This usually happens when there’s not enough binding agent or when the meatloaf hasn’t rested after cooking. Make sure you’re using the right amount of eggs and stuffing mix, and ALWAYS let it rest for at least 10 minutes before slicing with a sharp knife.
Can I add cheese to this recipe?
You sure can! Several readers have mentioned adding ½ cup of shredded cheddar or pepper jack with great results. I tried this variation last month when my cheese-loving nephew visited, and it was a huge hit!
Is there a way to make this recipe lower in sodium?
Yes! Use low-sodium Stove Top stuffing (or make your own seasoned breadcrumb mixture), reduce the salt to ¼ teaspoon, and use low-sodium ketchup for the glaze. This simple adjustment was a game-changer for my dad after his doctor recommended reducing his sodium intake.
Let’s Make This Meatloaf Part of Your Family Story
This meatloaf Stove Top stuffing recipe has become more than just dinner in our home – it’s part of our family story. From weeknight dinners when everyone’s schedules are pulling us in different directions to Sunday gatherings where we finally slow down and connect, this dish has been there through it all.
The beauty of this recipe lies in its simplicity and reliability. The Stove Top stuffing mix does double duty – adding flavor while ensuring a perfectly moist texture every time. It’s proof that sometimes the most beloved family recipes don’t have to be complicated to be special.