
Introduction
Have you ever tasted a dish that made you completely rethink everything you thought you knew about a particular ingredient? That’s exactly what happened to me with fish that night. I’d always been intimidated by cooking fish at home – worried about the smell, the timing, the texture. But this fish gravy was a revelation. The fish was tender, the sauce was rich and complex, and my kids (who usually turn their noses up at anything “exotic”) were asking for seconds.
I’ll be honest with you – I tried recreating this fish gravy seven times before I got it just right. Each attempt taught me something new, and now I’m excited to share all those hard-learned lessons with you. This South Indian style fish gravy has become our family’s go-to comfort meal, especially during those chilly fall evenings when we crave something warm and soul-satisfying.
Table of Contents
Ingredients List
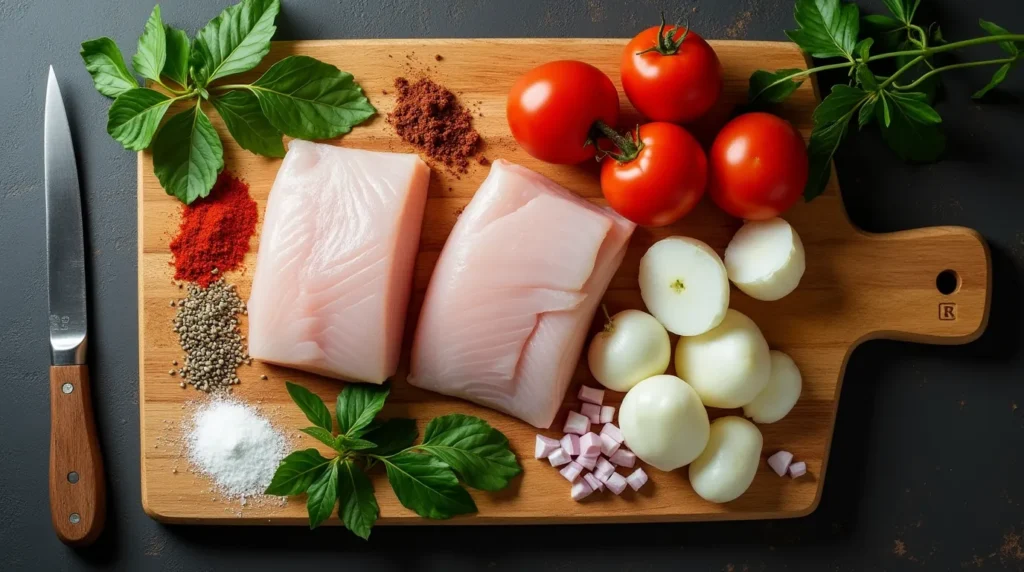
Here’s everything you’ll need to create this incredible fish gravy. I’ve learned over the years that having all your ingredients prepped and ready makes the cooking process so much smoother – trust me on this one!
For the Fish:
- 2 lbs firm white fish (I prefer cod or halibut, cut into 2-inch pieces)
- 1 teaspoon turmeric powder
- 1 teaspoon salt
- 2 tablespoons coconut oil (this is non-negotiable – the flavor is essential!)
For the Gravy:
- 1 large onion, finely chopped (I always keep a bag of pre-chopped onions in my freezer for busy weeknights)
- 4 tomatoes, chopped (those beautiful heirloom tomatoes from the farmer’s market work wonderfully)
- 6 garlic cloves, minced
- 2-inch piece fresh ginger, grated (I buy mine from the Asian market downtown – it’s always so much fresher)
- 2-3 green chilies, slit lengthwise (adjust based on your heat preference)
- 15-20 curry leaves (I grow these in pots on my kitchen windowsill now – game changer!)
- 1 can (14 oz) coconut milk (full-fat, please – don’t skimp here)
- 2 tablespoons tamarind paste (you can find this at most grocery stores now, or substitute with 2 tablespoons lime juice)
- 2 tablespoons coconut oil
- Salt to taste
Spice Mix:
- 2 teaspoons coriander seeds
- 1 teaspoon cumin seeds
- 4-5 dried red chilies (I remove seeds for less heat)
- 1 teaspoon black peppercorns
- 1/2 teaspoon fenugreek seeds
The aroma that fills your kitchen when you toast these whole spices is absolutely intoxicating. I remember the first time I ground my own spice mix – it was like discovering a secret that had been hiding in plain sight all along.
Timing
This is one of those recipes that benefits from a little patience, but the active cooking time is quite manageable. Here’s how I break it down:
Prep Time: 25 minutes (including marinating the fish) Cooking Time: 35 minutes Total Time: 1 hour
I typically start this recipe around 5:30 PM on weeknight dinners, which gives us plenty of time to eat by 6:30 when my youngest gets hungry. The beauty of this dish is that most of the cooking happens in one pot, so cleanup is minimal – something this busy mom definitely appreciates!
Pro tip from my kitchen: I often prep the spice mix and marinate the fish in the morning before work. When I get home, dinner comes together in just 35 minutes, which feels like a miracle on those hectic school nights.
Step-by-Step Instructions
Step 1: Prepare and Marinate the Fish
Start by gently patting your fish pieces dry with paper towels. In a large bowl, combine the fish with turmeric and salt, tossing gently to coat each piece. Let this marinate for at least 15 minutes – I learned the hard way that rushing this step results in less flavorful fish.
The first time I made this recipe, I was so eager to get cooking that I skipped the marinating time entirely. The fish was good, but it lacked that deep, golden flavor that makes this dish special. Trust me, those 15 minutes make all the difference.
Step 2: Toast and Grind the Spices
Heat a dry skillet over medium heat and add all the whole spices (coriander seeds, cumin seeds, dried red chilies, peppercorns, and fenugreek seeds). Toast them for 2-3 minutes until fragrant and slightly darkened. You’ll know they’re ready when your entire kitchen smells like a spice market in the best possible way.
Let the spices cool completely, then grind them in a spice grinder or coffee grinder until you have a fine powder. I keep an old coffee grinder specifically for spices – it’s one of those kitchen tools you don’t realize you need until you have it.
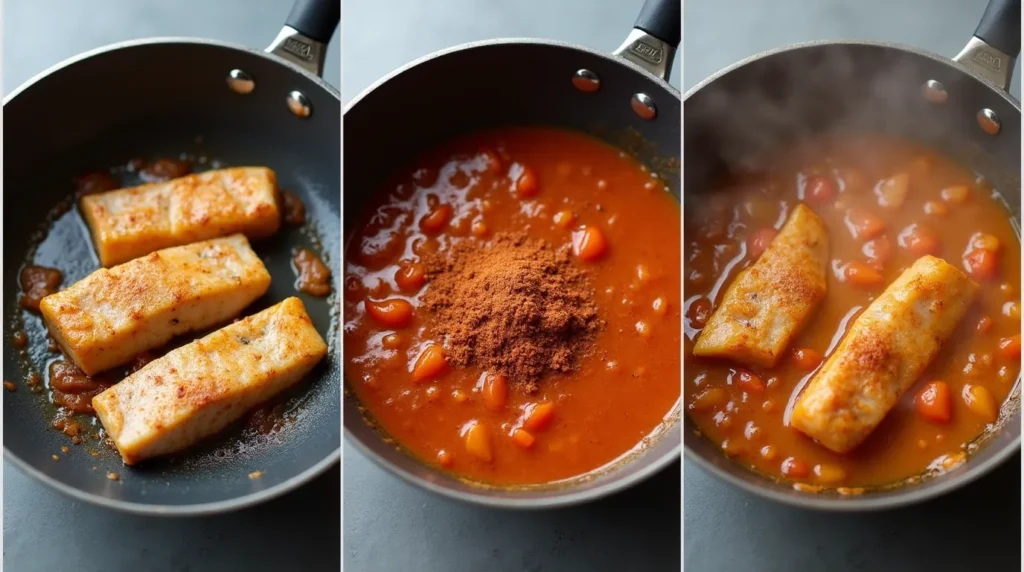
Step 3: Sear the Fish
Heat 2 tablespoons of coconut oil in a large, heavy-bottomed pot over medium-high heat. Gently add the marinated fish pieces and sear for 2-3 minutes on each side until golden. Don’t overcrowd the pot – work in batches if necessary. Transfer the seared fish to a plate and set aside.
This step adds incredible depth to the final dish. The caramelized edges of the fish create little pockets of concentrated flavor that make each bite special.
Step 4: Build the Base
In the same pot, add the chopped onions and cook for 5-6 minutes until softened and lightly golden. Add the minced garlic, grated ginger, green chilies, and curry leaves. Cook for another 2 minutes until incredibly fragrant.
Here’s where the magic starts happening – the aromatics hitting that flavored oil from the fish creates the most amazing base for our gravy.
Step 5: Add Tomatoes and Spices
Add the chopped tomatoes and your freshly ground spice mix. Cook for 8-10 minutes, stirring occasionally, until the tomatoes break down and the mixture becomes thick and paste-like. This is what we call the “masala base” – it’s the heart of any great South Indian curry.
Be patient during this step. I know it’s tempting to rush, but letting those tomatoes completely break down and meld with the spices is crucial for the final flavor.
Step 6: Create the Gravy
Pour in the coconut milk and tamarind paste, stirring gently to combine. Bring the mixture to a gentle simmer, then reduce heat to low. Let it simmer for 10 minutes, allowing the flavors to meld and the gravy to thicken slightly.
The coconut milk might look like it’s separating at first – don’t panic! This is completely normal. Just keep stirring gently, and it will come together beautifully.
Step 7: Finish with Fish
Gently nestle the seared fish pieces into the simmering gravy. Cover and cook for 5-7 minutes until the fish is cooked through and flakes easily with a fork. Taste and adjust salt as needed.
The key here is gentle heat – we want the fish to finish cooking without falling apart. I learned this lesson after turning several beautiful pieces of fish into fish soup during my early attempts!
Nutritional Information
As someone who tries to balance flavor with nutrition for my family, I love that this fish gravy delivers on both fronts. Here’s what you’re getting per serving (recipe serves 6):
- Calories: 285
- Protein: 28g (excellent for muscle maintenance and growth)
- Fat: 16g (mostly healthy fats from coconut oil and coconut milk)
- Carbohydrates: 8g
- Fiber: 3g
- Sodium: 520mg
- Potassium: 680mg (great for heart health)
- Vitamin C: 25% daily value (thanks to those tomatoes and chilies)
- Omega-3 fatty acids: High content from the fish
What I love most about this dish nutritionally is how it provides complete protein from the fish while incorporating anti-inflammatory spices like turmeric and ginger. The coconut milk adds healthy medium-chain fatty acids, and the tomatoes provide lycopene – it’s like a superfood disguised as comfort food!
Healthier Alternatives for the Recipe
Over the years, I’ve adapted this recipe for various family members and their dietary needs. Here are some modifications that work beautifully:
For Lower Fat Content: You can substitute light coconut milk for regular coconut milk, though you’ll lose some richness. I compensate by adding an extra tablespoon of tomato paste for depth.
Dairy-Free: This recipe is naturally dairy-free, which makes it perfect for my lactose-intolerant sister-in-law.
For Added Vegetables: I often throw in diced bell peppers or green beans during the tomato-cooking stage. My kids actually prefer it this way – they get their vegetables without realizing it!
Lower Sodium Option: Use low-sodium canned coconut milk and reduce the added salt. The tamarind and spices provide plenty of flavor complexity.
For Heartier Meals: Sometimes I add cubed potatoes along with the fish. They absorb the gravy beautifully and make the dish more filling for growing teenagers.
Pescatarian Protein Boost: I’ve successfully made this with firm tofu or paneer instead of fish when cooking for vegetarian friends. Just adjust the cooking time accordingly.
Serving Suggestions

This fish gravy is incredibly versatile, and I’ve served it in so many different ways over the years. Here are my family’s favorites:
Traditional Style: Serve over steamed basmati rice with a dollop of plain yogurt on the side. This is how Mrs. Priya first served it to us, and it remains my go-to presentation for dinner parties.
Weeknight Casual: I often serve this over quinoa for extra protein and fiber. My health-conscious teenager actually prefers it this way now.
Bread Lovers: This gravy is fantastic with warm naan or even crusty sourdough bread for dipping. We had it this way during a cozy Sunday lunch last winter, and it felt like a warm hug.
Summer Fresh: During hot Atlanta summers, I serve smaller portions over coconut rice with a side of cucumber raita and fresh cilantro. It’s cooling and satisfying without being too heavy.
Meal Prep Friendly: I portion this over brown rice in glass containers for easy work lunches. It reheats beautifully and actually tastes even better the next day.
Holiday Brunch: Believe it or not, this makes an incredible brunch dish served over coconut rice with a poached egg on top. I discovered this combination by accident during a lazy Sunday morning, and now it’s requested regularly.
Common Mistakes to Avoid
Let me save you from the mistakes I made while perfecting this recipe – some of them were pretty spectacular failures!
Overcooking the Fish: My first attempt resulted in fish that looked like it had been through a blender. Fish continues cooking even after you remove it from heat, so err on the side of slightly underdone when you first add it to the gravy.
Skipping the Spice Toasting: I know it seems like an extra step, but toasting whole spices before grinding makes an enormous difference in flavor depth. Pre-ground spices just don’t compare.
Using Cold Coconut Milk: Adding cold coconut milk to hot gravy can cause it to separate. I learned to let my coconut milk sit at room temperature for 30 minutes before adding it, or gently warm it in the microwave first.
Rushing the Tomato Cooking: This was my biggest mistake initially. Those tomatoes need time to completely break down and caramelize slightly. If you rush this step, your gravy will taste flat and one-dimensional.
Wrong Fish Choice: I once tried making this with a delicate fish like sole – disaster! Stick with firm, meaty fish that can handle the cooking process without falling apart.
Burning the Aromatics: Keep that heat at medium when cooking garlic and ginger. Burned garlic will make the entire dish bitter – learned this the hard way during a particularly distracted cooking session!
Storing Tips for the Recipe
This fish gravy is actually one of those dishes that tastes even better the next day, which makes it perfect for meal planning. Here’s how I handle storage:
Refrigerator Storage: Store in airtight containers for up to 3 days. The flavors continue to develop and meld beautifully. I always make extra on Sunday knowing we’ll enjoy it even more on Tuesday!
Freezing: While you can freeze this for up to 2 months, I find the fish texture changes slightly upon thawing. If you plan to freeze, I recommend freezing just the gravy base and adding fresh fish when reheating.
Reheating Tips: Reheat gently over low heat, stirring occasionally. If the gravy seems too thick, add a splash of coconut milk or water. Never microwave on high heat – it can make the fish rubbery.
Make-Ahead Strategy: I often prepare the gravy base (everything except the fish) a day ahead. Then I just sear fresh fish and add it to the reheated gravy for a quick weeknight dinner.
Portion Control: I freeze individual portions in ice cube trays, then transfer to freezer bags. Perfect for those nights when only one or two of us want this particular flavor profile.
FAQs
Jane from Chicago recently asked me: “Can I make this less spicy for my kids?” Absolutely! Reduce the green chilies to just one, and remove the seeds from the dried red chilies before grinding. My own kids actually prefer it this way, and you can always add hot sauce on the side for the adults.
Mike from Denver wants to know: “What if I can’t find curry leaves?” Fresh curry leaves really do make a difference, but you can substitute with bay leaves (use 3-4 leaves). Many Indian grocery stores sell frozen curry leaves too, which work almost as well as fresh ones.
Sarah from Phoenix asked: “Can I use canned tomatoes instead of fresh?” Yes! Use one 14-oz can of diced tomatoes, drained. The cooking time will be slightly shorter since canned tomatoes break down faster than fresh ones.
David from Seattle wondered: “Is there a way to make this ahead for entertaining?” This is actually perfect for entertaining! Make the entire dish (including the fish) up to one day ahead. The flavors improve overnight, and you just need to reheat gently before serving.
Lisa from Miami asked: “What’s the best fish to use if I can’t find cod?” Any firm, white fish works beautifully. I’ve had great success with halibut, mahi-mahi, and even salmon steaks cut into pieces. Just adjust cooking time based on thickness.
Conclusion
This South Indian style fish gravy has become so much more than just a recipe in our household – it’s become a bridge to new flavors, a comfort food for difficult days, and a dish that brings our family together around the dinner table. The combination of tender fish swimming in that aromatic, coconut-rich gravy never fails to satisfy both our taste buds and our souls.
Happy cooking, friends!